TIPS AND TECHNIQUES

Friday, March 28, 2014

Elegant Birthday

Birthdays, birthdays, birthdays......so many ideas floating around in my head but for now I had to come up with a card for my sister.  This particular sister is very critical of alot of things.  You can work hard frosting a cake and she"ll find the "1" crumb that hit the top of the frosting.  You sand a piece of wood and she"ll find the "1" little tiny dent in the wood.  So when I needed a card I had to make sure it was one that would be easy, with little on it that would get messed up.  So I opted for this white card.
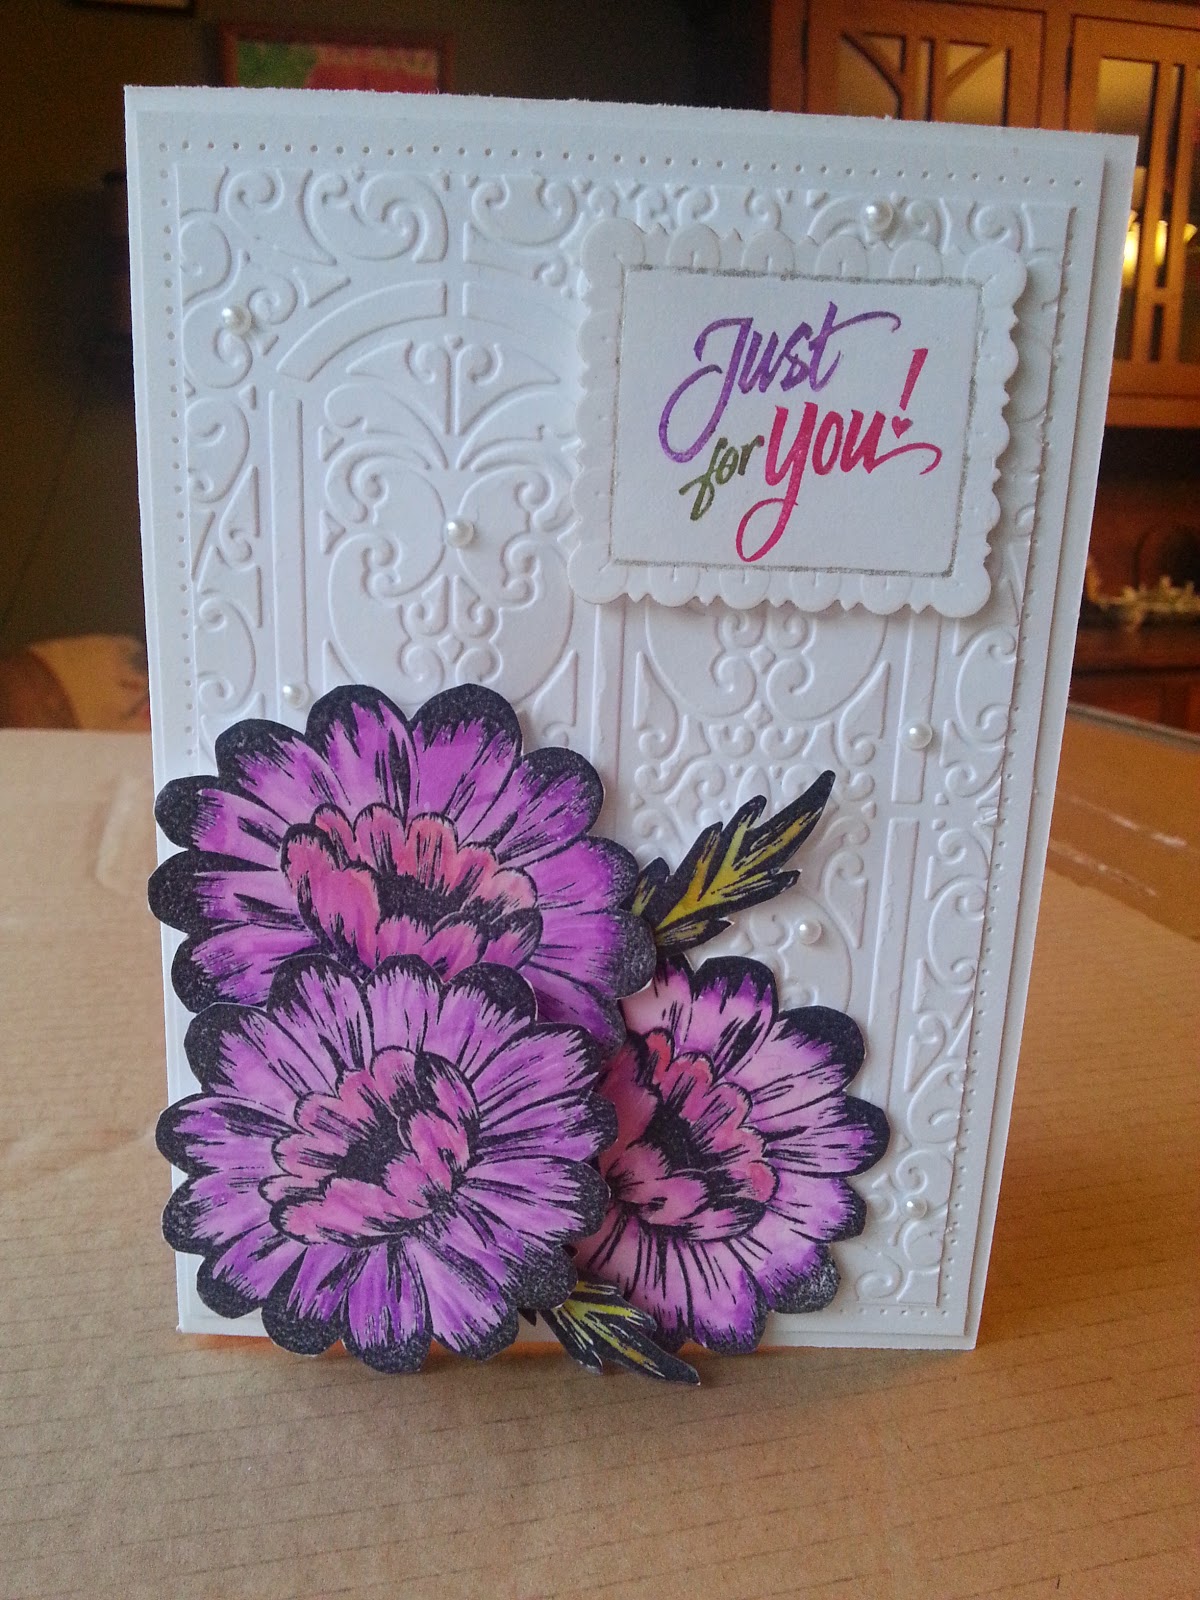
I used a 5x7 card and on the first layer I just used my paper piercer and made a border all around the edges.  The next layer I placed in an embossing folder and rolled it through my big shot.  I then stamped and colored the flowers and leaves and fussy cut them out.  They were arranged on the card and then I used foam squares to layer.  Added a few pearls and the "Just for You" and DONE.  I see nothing she can find wrong (I hope).  Off in the mail it goes before I start second guessing myself.(which I tend to do)  Now to go let my creative juices run a little more at ease.  What shall I make next?  Think I need to stay true to my commitment of at least 1 Christmas card a month and get one done.  I think I missed this month.  Ohhhh...I also said I was going to do more manly cards.  Not following through is why I don't bother with New Years Resolutions!  LOL

Happy Carding!

Thursday, March 27, 2014

Card night with the Ladies

Well I've had alot of stress around here lately so last week I really needed my night out with the "Ladies".  Though not all of us showed up it was a very productive evening with lots of laughs and conversation.  I'm really loving these gals!  We made a couple birthday cards and an everyday card.  I really loved the birthday card with the butterfly.  June originally made this card as a wedding card with a heart in the center and doves on the side.  Very pretty, but just as pretty tweaked into a birthday card with butterflies and flowers.

On the blueish card we used a large dragonfly stamp and did background stamping with a Kaleidoscope ink pad,  The effect was totally awesome.  I have got to get one of those pads.  We then fussy cute the dragonfly for the bottom right corner.  The candle birthday card was a cute idea too.  we rolled coordinating DSP into a tube, used the wing from the bird punch from Stampin Up  as the flame and some string for the wick.  Easy Peasy!  The butterfly card is a hanging  easel card.  I had never made one of these so it was and instructional evening as well.  We used 2 different size framelits for the archway.  The flowers hide the fold.  
  Now it's time to work on a Birthday card for my sister.  Wonder what I'll come up with?  Heehee!

Happy Carding!!!

Tuesday, March 18, 2014

CARD SIZES

So I have spent an entire weekend figuring out card sizes.  These are just basic measurements for basic cards and the size paper needed and size of envelopes needed.  So many numbers!!  I decided to make this because frequently I think of making a card and willy nilly wing my measurements.then I go crazy needing to make an envelope because my card ends up a smidgy too big for ANY envelope I already have.  My next step is to make a sheet of measurements for some of the "Fancy Fold" cards and envelopes.  That is definitely going to take me a while.  In the meantime I'm going to laminate what I have and hand them out to my club ladies the next time we meet.  Since I have never posted a file like this before, I can only hope that you too will be able to print it out for your use. 

Ok so I guess this has transferred ok, but what a pain...I had to change my file over to a picture file.  Which of course I had no idea how to do it.  Did a copy/paste onto a Microsoft "Picture it" thingy (yeah I know... I sound pretty computer illiterate) and then saved it as a picture file.  There has got to be a way to attach a word file to this blog but darned if I know.  Haha.  That's ok at least I got it posted.  Hope you find it useful.

Happy Carding!

Saturday, March 15, 2014

C.A.S.E. Cards

So as I was reading some blogs today I came across a woman talking about a C.A.S.E. card.  Having absolutely no idea what that meant, I just continued reading her blog and admired her card.  It must be a day for C.A.S.E. cards because shortly afterwards I came across another blog talking about a C.A.S.E. card.  Though this one looked nothing like the previous one I saw in an earlier blog, so off I go searching the web for C.A.S.E. cards.  I have no clue what that word meant so I  googled C.A.S.E. Cards and in images you get: Graphics for display cases of alcohol, wallets (don't understand that), cell phone hidden compartments, deck of cards "cases".....hmmm.  Nope that isn't it!  The web has sites for baseball cards "cases" or credit card "cases".  Nope and Nope!  Finally went to Splitcoast stamper site and searched C.A.S.E.  Surprise there is a whole thread related to it. "Copy And Steal Everything" or "Copy And Share Everything".  Silly me for thinking every card is an original.  After reading the thread it made perfect sense to me, there can only be so many card layouts and it is the papers and the way its embellished that makes them all seem so different though with the same layout.  Well I learned something new!  I thought I knew quite a bit in the card making world but I guess not.  So without further a due.....here is my C.A.S.E. card. 
I used Old Olive for the base of the card, stamped some flowers on some watercolor paper and colored with Tombow markers.  The stripe double sided paper was just something I had in scraps.  I stamped my words with those individual letter stamps from Michaels Dollar section. ( you know...those ones with little wooden sticks and each stick has a letter?)  Not the easiest to use and of course there was no way I could get them lines up right because each one is not centered on the stick. (go figure!)  What did I expect for a dollar?  I distressed the sides with a little Distress ink by Tim Holtz and added a little "Bling" to each banner.
That's all for now so...Happy Carding!


Sunday, March 9, 2014

EMBOSS IDEA

A good Sunday Morning to everyone!  Up bright and early here since I have had my grandson here doing a sleepover.  Little tike gets up mighty early!  Anyway thought I'd share a card inspired by Gina K. Its an all occasions card that can be uni-sexed.  Just swap out the flowers for something manly like a fishing pole or golf club.   She uses 2 different embossing folders on 1 layer.  You first stamp a small image and text in center of the cardstock piece.  Then using 1 type of folder (choose 2 that go nicely together) line up on upper part of  the CS avoiding your image and then use the other folder for the bottom lining it up to avoid the saying.  Next using your score board, turn CS over and line up embossed areas with nearest scoreline and score.  This will create a mountain score on front of CS.  Repeat on other embossed area.  Adhere the piece to another layer, add ribbon with button and attach to card base.  Easy Peasy!  This took about 6 minutes start to finish including measuring and cutting.  This could be whipped up as a mass produced Christmas card too which could be so quick and easy.  Make base a red or green, a coordinating layer next, then white CS for embossing (using 2 winter themed folders).  Stamp a pine branch with a pine cone (or whatever else you have) add greeting, Cute Cute Cute!
Hope I didn't sound confusing.  Sometimes when I try to explain things I get wordy and repeat!  Sorry if I did.  Well I guess it's time for me to start making some breakfast around here!  The sooner that's done the sooner I can get into the craft-room while Grandpa keeps the little guy occupied!

Happy Carding

Saturday, March 8, 2014

New Stampin Up Watercolor paper pack

So Stampin Ups new paper pack called watercolor is so darn pretty. (and no I'm not a demonstrator)  My ladies group made a cute card with one of the papers.  Everyone there needed a baby card except me so I changed mine to a birthday card.  We were using a stamp set from Inky Antics along with the Honeycomb paper pad to pop out a balloon on the inside.  I had never used this stuff before and it was quite easy to use. Though I don't make many cards in this type of style, they would be cute as kid cards and you use so very little of the product.  It is available at Michaels and comes in a 5x7 sheet.  There is only 1 in a pack though I was confused and when I bought the one that said rainbow pad I thought I was getting multiple sheets!  But "No" you only get 1 per pack and it retails for about $5.99.  It is in the stamp aisle.  I was told you could create your own templates to use the Honeycomb pad but I suggest you buys one of the Inky Antics stamp sets that use the Honeycomb pad.  Much easier for first timers!

 See pretty cute.  There are two stamp sets used here.  Front of card is the baby stamp set and inside plus all captions are from the birthday set.  Just so happened that June had both sets so I used both.  Aren't those polka dots adorable?

As a secondary card last night we made an update version of my Manly card.  Instead of being a 6x6, I made it a 4.5 x 6.  Easier to mail.  Then I had another one that I made as a 4.25 x 5.5 which I made a bit more girlish but with the same paper.  Everyone loved the idea of having two options and a man card was definitely the hit of the night.

Well off to work on some new ideas!  Enjoy the weekend and HAPPY CARDING!

Monday, March 3, 2014

Vintage can be Manly!

So once again I was watching You Tube video's.  Lately my daughter-in-law has consumed my craft room with a major school project constructing a scrapbook for a fellow teacher for the counties "Teacher of the Year" award.  This is done yearly with each school nominating a teacher and the county then goes through hundreds of notebooks (1 per teacher) to determine who will be chosen.  With my daughter-in-law being the craftiest staff member, she gets the job of putting together a enormous yet beautiful scrapbook for their nominated teacher.  So needless to say since I have all the machines, punches, etc.  she has been up in my room scrapping away.  Finally finishing over the weekend.  So with nothing to do I watched some amazing videos.  One was for a card using that vintage newspaper looking paper.  Archivers use to sell it but since they closed I may have to search around for some more since I only have 1 sheet of it.  I really don't remember who's video it was but I think her name was Marilyn something.  (I have got to get better at remembering who's video's I've been watching)  Anyway she had put some shabby chic flowers on hers and it was so pretty.  But.....I want to stick with guy cards so I just tweaked it a bit.  I used a Tim Holtz embossing folder that had clocks on it and cut out 1 of the clocks after I embossed some kraft paper.  Added a brown satin ribbon ( would have rather it was grosgrain but I didn't have any) and then took 2 old brass buttons and cut off the shanks with wire cutters.  Not bad!  Another guy card that could easily be converted to a gal card just by switching embellishment to flowers or butterflies!  Now that I think of it...the lady that did the original card used a paper bag that looked like vintage newspaper.  Ebay has these if you don't feel like searching for the 12x12 paper like I used.
Cute huh?  I made this with a base card of 5 1/2 x 5 1/2 mainly because its a guys card and guys have big hands and don't really like small, dainty cards.  Not the easiest size to find an envelope for.  Guess I'll have to take out my Making Memories envelope score board and make a custom envelope.  Maybe I'll try making the next one a regular A2 size! 

Happy carding!


RETIFORM CARD

Time for a masculine type card.  Ok technically you could use it for a women too since it does have some flowers and a few butterflies though I cleverly hid them a bit.  I saw this on StampTv about 2 months ago and loved this technique.  If you get a chance check out her video, very easy to do.  First I must admit I do not own anything from Gina K.  So to do this card I ran around the scrap room looking for similar colors and stamps.  Her card was also vertical but I made mine horizontal because I wanted the ribbon to kind of hide the butterflies.  The basic colors are a asparagus green or maybe an olive green then I used Tim Holtz burlap die pad and stamped in a chocolate brown die pad.  Gina had a real nice grosgrain ribbon but all I could find was a piece of brown velvet ribbon.  Her sentiment was an oval Happy Birthday but I opted for something more generic and horizontal.  Matted it on brown card and used a cream base card.  She does not have card measurements on video but I used a 4 1/2  x 6 1/2 size.
These are the same card, just on 1 (left) I used no flash and on the other (right) I used a flash.  I love this card.   think if I was to give it to a woman I would probably put a flower on left on top of ribbon and 
use a circle for sentiment.
It's so hard to come up with guy cards so I'm dedicating some time to get a few done to have on hand.  Might even teach this technique to my ladies group.  

Happy carding!!