TIPS AND TECHNIQUES

Saturday, October 1, 2016

POP OUT FOLDING SCREEN CARD

So here's another one I found.  Though I no longer have the card I made with this template, you can probably figure it out if you refer to the Asian Screen card I made quite a bit earlier.   At the moment I just want to get these posted before I forget all together!  So here we go........................

Today's card took me forever to get down dimensions.  I saw this on line tutorial on how to decorate the screen cards from the Hunkydory Screen card pack called Eastern Promise.  I had earlier tried making a Screen Card and if you look back at the post  Asian Screen Card     you can see how that one turned out.  I really liked it and even decided to show the Stamp group how to make it.  Then I saw this one and "Oh My Gosh" !!!!!  Soooo pretty.  I was up for the challenge, So I sat down one afternoon and started measuring.  I penciled in numbers and lines everywhere.  Cut where I put cut lines and folded the others, only to find I was off by maybe 1/8 inch on one side and about 3/16" of an inch on the bottom center cut....DANG.  Back to square 1.  Next one I some how totally eliminated 1 whole section due to improper fold measurements and silly me folded and started cutting until I got  frame 3 done and realized there wasn't any frame 4.  Oh for "Pete's Sake"!!  I think I finally have the base of the card right.


cut on solid lines and fold on dash lines
See...I figured it out!  Whew!  LOL   So after cut and folding....and I know it looks complicated but really it not, The card is ready to have it's feet put on the bottom.  

Using a 2.5 label punch, center half of the label in each of the four sections.  This is done the same way as the original Asian Screen card I did earlier.  Should look like this:
Ignore all the number scribbles on there.  I wanted to use all my bloopers so as not to waste a ton of papers.  The label punch just gives you a little bit of elegance to the screen.
Now your ready to decorate.  Some measurements for some of the pieces are below.
I really need to think about how I want this one to turn out.  I keep leaning to butterflies because it seems to go with the Asian theme of a screen but I want different.  I like my cards to have multiple uses.  Unfortunately I started with pink DSP because I needed another birthday card (figures).  So as much as I would like to do something totally off the beaten path I think Flourishes and Flowers will adorn this card.  Because of the "I" shape of the template I decided not to double up on the paper and just use 1 layer of DSP.  

Enjoy and 
HAPPY CARDING


Birch Tree Winter

Ever go through your posts and realize there are a few you started and saved as a draft but then never remembered to post it?  No???  Really???  Is it just me??  Probably!  Sometimes I just get carried away and will write 2 or more posts but not think they are complete enough so I save them til later and then I forget!  LOL  Well this is one of them.  I actually wrote this wayyyy back in November of 2015.  Actually I found a few so I'm going to go into edit and see if they are worth sharing.  So here's Novembers............

Ahhhh....the woods.  My favorite spot.  So why not make a woodland card?  I had watched a tutorial by Linda Bauwin on a Faux Illusion Technique.  I totally C.A.S.E.D this card.  Twice!!!  The first time was with my friend June.  We used her new Sizzix birch tree embossing folder.  This is a large folder so you could make a 6x6 card if you'd like.  Ours was actually a 5.5 x 5.5 


We used a piece of light blue cardstock. Not sure of the name because it was a scrap.  She had a tree stamp and we used Artichoke stamp pad.  The trick to getting the spruces behind the birch's is that you stamp your image on the recessed part inside your folder.  If you open your folder you will find that 1 side is raised and the other indented.  Stamp on the indented side.  Then run it through your Big Shot or Cuttlebug.  Remove cardstock and the trees are behind the birch's!!!  WAY COOL!!   Then with White ink pad and a dauber rub on white ink to the raised birch's to turn them white from blue.  Someone else used white card stock and inked both the sky and evergreens on the inside.  I think it's easier this way but you choose.  Once all the trees are white use a brown marker and just go over some of the hashes on the birch.  We decided we really liked our scrap piece and decided to turn it into a card so we trimmed it to 5.25 x 5.25 and adhered it to Artichoke cardstock.  I had also showed her a quick idea for sentiment's so we whipped up 2 and put the Christmas greeting in an unexpected red on our blue and green card.  It works well don't you think?

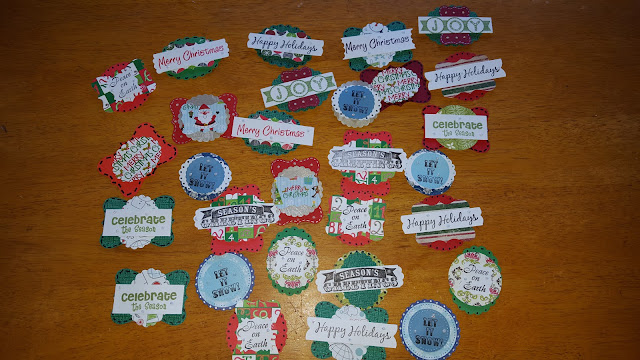
Speaking of the sentiments....we needed some for the Residents to put on their homemade cards so I just whipped up a few.  Still need a bunch more but it's a start.  Here's what I have so far.

Till later
HAPPY CARDING