TIPS AND TECHNIQUES

Saturday, December 28, 2019

Christmas Place Setting boxes

Well Christmas is nearly here and I have all my cards mailed, gifts wrapped and food bought for the family gathering Christmas Day.  Last year I swore that I would not be doing everything last minute and I succeeded.  I'm so happy.  Not stressed and very relaxed.  So with 3 days left before the big day I decided to make some little treat boxes to put at each place setting.  These are super cute as well as super easy.  They kind of resemble a milk carton.  Kind of between a bag and a box.  A Bag Box!  Anyway I only needed 12 for the adults and I filled them with little dark chocolate pretzel balls.  YUM.


I tried so hard to make something for the kids table too but ran out of time due to a migraine.  But the adults all loved the cute additions to our table.
Hope your holidays were fantastic and until later........................
HAPPY CARDING

Sunday, December 22, 2019

Mini Album Ornament

Merry Christmas!  Did you have your cookies made on time for Santa?  I did whewwww.  I have a yearly bake day with my daughter in law, sister, and her daughter in law.  We make tons of cookies and also deliver big trays full to the fire dept and public works dept in our town.  We also always take pictures of these cookies to help us remember year after year what we made.  This year I decided to put some of the pictures from this year into a mini album for each of us.  With only a small hand full of pictures I knew the album would be tiny.  Our luck we would lose it.  hahahaha  So instead of just an album I decided to make it into a ornament.  I followed the tutorial by Samantha on cutcardstock blog found HERE  Her process is so super easy to follow and they turn out great.  I added the ribbon for a hanger before gluing B to A.  You'll understand when you read her directions.  And here are mine.  All ready to give to the girls on Christmas as a little something extra.  They thought they were adorable and decided we needed to take way more pictures next year.


Til later
HAPPY CARDING

Tuesday, December 17, 2019

More Scrap Christmas Tags

In case you haven't figured it out yet, I have an obsession with making as many tags as possible from the tiniest scraps.  Today's post is no exception to my rule. "Use all that you can".  So when my granddaughter came over on the weekend to make tags for teacher gifts I was sure to save everything she didn't use.  I had 6 sheets of 6x6 papers that she absolutely loved.  It was left over from a pack I got at Michael's that my Niece used for her cone wreath.  This pack was all about cats and dogs and my granddaughter loves animals.  So much so that she volunteers at a shelter once a month and she's only 11.  So proud of her.  Anyway she made 11 tags from the papers I gave her.  Yes I know that's alot of teachers, but she had also made the tags for her brothers gifts to his teachers and her sisters.  My Grand daughter has a big heart and likes to give little gifts to the lunch lady, librarian, office workers etc.   I looked at all the weird shaped and size pieces she had leftover and thought OK this is a challenge.  You see when I cut paper I try to be as neat as possible and not waste space.....my granddaughter on the other hand just cuts right in anywhere.  But I was determined to use those scraps.  Ta Da!  I got 37 various sized tags! 

Now I know they are not fancy but these are Perfect for the kids gifts.  I won't have to gasp as they rip the gifts open and throw away my little works of art.  I should really make more of these ease up on my stress a bit. lol  Let me tell you I used every bit of the scraps and still have 1 whole 6x6 sheet left.  That's alot of tags from 5  6x6 sheets.  Just imagine what you can do with your scraps.

Til next time....................................................
HAPPY CARDING

Sunday, December 15, 2019

ABOUT FACE FORWARD MARCH

OMG I'm in love with a soldier!!  A wooden one that is.  I saw these all over Pinterest and LOVED them.  Batted my eyes and I was able to get my darling husband to cut me out 8 boards and foot bases.

These guys are soooo cute.  They are made from a 1x6x36 inch board and their feet are 4x4's cut to the same width as the boards.  That allows them to stand at "Attention".  My husband routed a little grove on the 4x4's to make it look like they were wearing shoes.  I made stencils for everything that wasn't a straight line.  Gold metallic pens are my friend lol.  There was alot of gold work on my guys.  I also found out that when you spray varnish over gold metallic paint pens it softens the ink and will smudge if you touch it.  Good thing retouching was an easy task.  These guys are gifts for my lady friends that I craft with.  I can't wait to see how they like them.  Rumor has it one of the other ladies is also doing a wood craft as our gifts.  Sure hope we don't have the same ideas!  LOL

That's all for now til next time
HAPPY CARDING!

Special Spinner cards for Christmas

This year I had decided to get a head start on all my Christmas cards.  On an earlier post I told and showed you all the cards you could make using 1 Christmas Paper Pack and I got alot from it.  I think there were 60+ cards along with a large collection of tags all from the same pack.  Well I had also decided that instead of whipping up a las minute card for my lady friends to go with their gifts, that I would be proactive and make their cards in advance too.  I am so glad I decided to do that because I had found the most adorable card on you tube called the Elegant Spinner card.  I made all four of my cards the same so save me from thinking this out too much.

Isn't this cute?  The back of the card is where the sentiment goes and it all lays flat to slide into an envelope.  The link to this tutorial is: HERE  She explains very detailed and is easy to follow.  Check her out.  These cards are going to be the perfect addition to my lady friends gifts which I will share in my next post.

Til then 
HAPPY CARDING

Monday, December 9, 2019

Atari Ornaments? OK

Remember Atari?  Video games of the 80's.  My son loved it and never got rid of his system.   He collected and horded games and has since expanded his own sons video game interest into the Atari world.  We are all so surprised that my grandson actually likes playing these old games.  My son has actually searched for old 1980's TV sets.  Once the word got out that he wanted one people in our community started contacting him offering him theirs free if he picks it up.  He loves the 80's and has formed a little corner in his world with retro stuff.
My sons passion cracks me up and watching my grandson in a room that looks just like ours did back in the 80's brings back so many memories for me.  If I didn't know better I would swear the little guy in the picture was my son instead of my grandson.  Anyway back to the point.  My son had received 4 round Atari stickers which he gave to me to turn them into ornaments.  He wants to add a little tree to his corner and thought Atari ornaments would be awesome.  Being a paper crafter makes it a bit easy to come up with a plan.  So here's what I made for him.  His very own Atari Ornaments.   
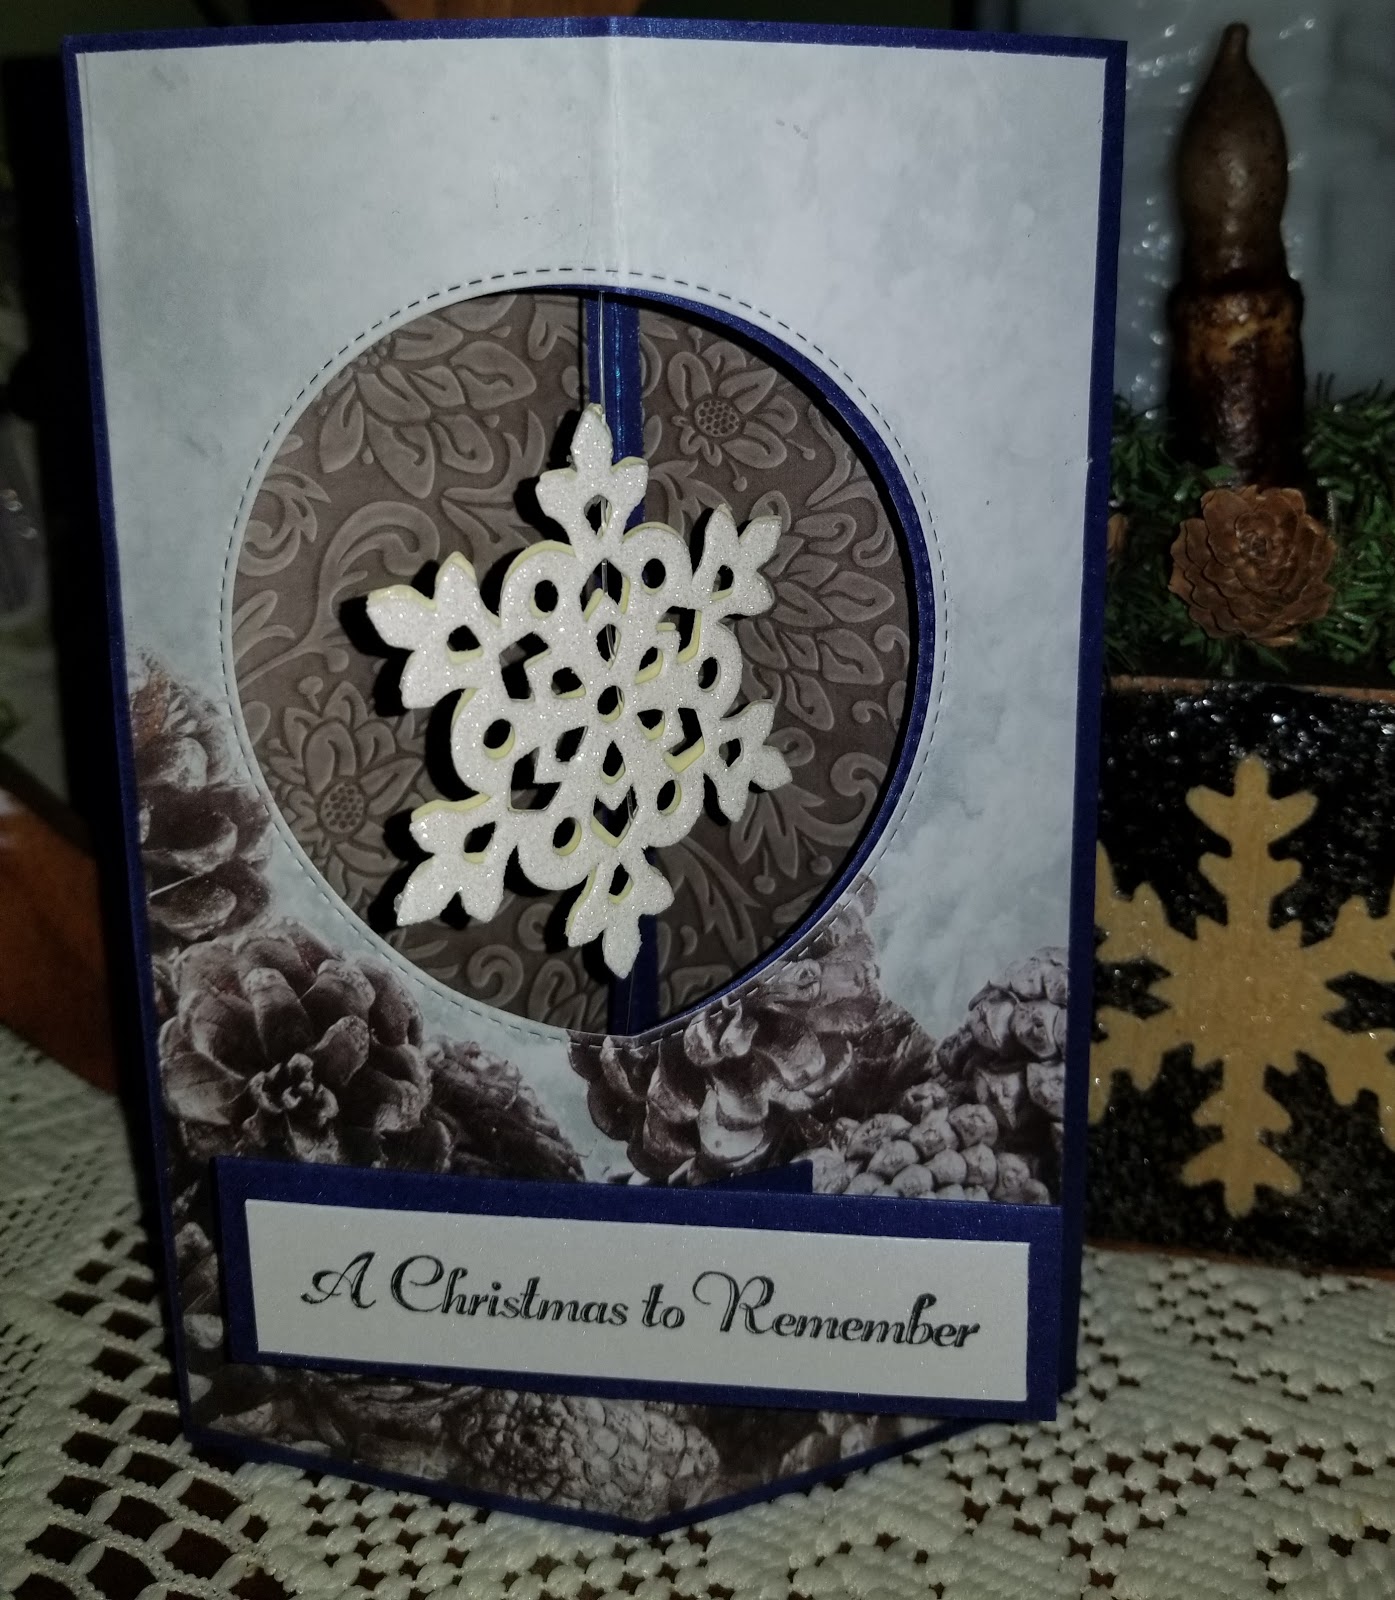
As you can see I used the Maymay Made it Wreath idea as an ornament.  One on bottom right is a rectangle treat box ornament with the smaller sticker popped up.  The 2 larger stickers with the blue background were 3" in diameter so I just used 1 for the front of a snowflake ornament and the other as a ball ornament.  He loved them and plans on taking a staged photo for his Facebook profile pic.  How much do you want to bet that he steels my Charlie Brown tree too?  LOL  That boy keeps me on my toes for sure.

Til next time..........
Happy Carding!

Thursday, December 5, 2019

CHRISTMAS TAG RUSH

Three weeks and counting til Christmas.  I have the house decorated.  The presents bought (not wrapped yet).  The main food for the feast in the freezer and my cards all mailed.  Now all that's left is random crafts and tags for the gifts.  Though I have made a ton throughout the year.  
When I was at Michael's a few weeks ago I saw these 6x6 paper pads for $5.  I picked up a bunch and used some to create that Maymay made it wreath with my Niece in law but I still had alot of unused pads.  So to the table I go.

The 2 pads I'm using today are Christmas Farmhouse and North Pole News by Recollection.  These are single sided pads but very pretty papers and perfect for tags.
I pulled out the usable background sheets from each pad as well as the cut apart sheets I could use.  Between the 2 pads I got 9 background sheets and 4 cut apart sheets.
Away I went!  All of my large tags are 2.5 x 6 and out of those background sheets I was able to get 18 tags.  But I still had scraps.  I have this insane issue where I seem to need to not waste a thing so I was also able to get 7 small tags that measured 1.75 x 3.75.  You would think I'd quit there but NOPE!  I got 4 more tags using the scraps of scraps.  1 large, 1 small and 2 odd sized ones using up just about everything.  including the circles from punching the holes for the grommets (which I made from scraps heehee)
So here they all are:
Do you see that little pile of scraps in the right had corner?  That is literally all that is left of those 9 sheets of 6 x 6 backgrounds.  I now need to use those cut aparts and start embellishing those tags.  I also need to add ribbons too.  Technically these could be used as is.  The papers are so pretty I hate to cover them but if I don't jazz them up then it wouldn't be me!  But I did want to show you that with bare minimum you can have a little collection of tags for special gifts.  And incase you are wondering all my tag bases are made from recycled paper.  A company was moving and changing their logo so all the card stock, linen stationary, and envelopes were going to be disposed of.  A friend of mine works there and brought home alot of it.  I was lucky enough to get some and with some cutting I was able to repurpose the papers.

All I did was remove the green and the black line and I'm able to cut this down for tags.  I'm able to get 3 large tags and  smaller one per sheet.  Its a WIN for me.

Well I'm off to decorate my tags.  Hope this inspires you to whip some up soon.

Til later
HAPPY CARDING

Sunday, December 1, 2019

Christmas Box Fun

HO HO HO HO!!!!  Christmas is coming!!! Sometimes I feel like a little kid.  I love everything about Christmas.  The Music.  The Stories.  The Baking.  The Presents.  How oh how did I have the patience to wait when I was a child?  My grand kids are so antsy all month.  To help settle down the ants in their pants I created the Christmas box.  Ok I didn't really "Create" it I embellished the idea.  There are a ton of ideas on the internet pertaining to this box.  Most are just a box for Christmas Eve.  It would include things like new Jammie's, a Christmas story book, maybe some candy.  Everyone has their own take on the idea.  I expanded it for my grand kids and made it into a box with activities for the entire month.  My first one was just an Amazon box decorated and filled.  I had decided I'd like to have a reusable box so I made one from a Michael's wooden crate.  Then comes the fun part.  Gathering items to excite the kids.  This year I added hot cocoa mugs for everyone and at least 4 regular craft items.  Then the staples for the box's like reindeer food, Santa soup, Christmas movies popcorn for movie watching.  The kids also get the paper and envelopes for Santa letters to the north pole.  I tuck in a calendar and fill the days with some suggested activities like dropping off cookies at the firehouse or go to Dickens in Dundee to look at the holiday window displays.  The kids absolutely LOVE this box.  Now it does take some planning and you do have alot of paper work to gather but the internet helps with free printables so you just have to decide what you want in your box and print away. Make up your own little calendar and fill in the activities.  This website has some nice printables that I have used.
Christmas Box


Now I will admit if I was a young mom with small kids there is no way I'd be able to pull this off.  Not on top of regular Christmas stuff.  But I'm a Grandma....I have time so why not.  I know moms have things to do, cooking, cleaning, homework cop, shopping ...the list goes on and on.  But if you do find the time this is a great treat for the kids.  Keeps them busy and it makes waiting for the big day easier.

Til Next Time...............................
HAPPY CRAFTING!


A Natures Wreath

This year my husband and I decided to go visit my sister up north and stay in her spare cabin (I know right?  Who has spare cabins?) for the Thanksgiving weekend.  Usually I'm home and visit with the grand kids but this year brought other plans.  So I hurried and decorated my house for Christmas before we left since usually I get this done over Thanksgiving. Upon arriving at the cabin I was already feeling remorse at leaving everyone behind.  I had no cooking to do as I was instructed to do NOTHING.  So I decided to put a little Christmas into the cabin.  I started first with a little tree she had tucked in a corner. Added lights and beads and a few old ornaments I found in a closet and a dish towel for a skirt.  lol.  It was cute enough for me.  I also found some blue garland, a large pine cone and 2 nut crackers she had in a cabinet so I spruced up the fireplace as well.  I had then decided the front door needed a wreath.  My darling husband went out and trimmed a few branches from some trees and I gathered some smaller pine cones, a piece of driftwood and some seagull feathers from the beach.  We used a coat hanger for the base and not having any ribbon I decided to put a Piggly Wiggly shopping bag to use.  After all it was red and white so it would work.  Everything turned out great and we had an awesome Thanksgiving away from home.  I hope you all had wonderful Thanksgivings as well.


A little glue...glitter... and nature go a long way! I also took a glass Ice coffee bottle and added some red branch's from some dogwoods by the driveway.  A little glue and a little glitter a couple pine cones and BAM instant table center piece!
Mmmmmmmmmmmmmmm....................peaceful!

Til Next Time
Happy Crafting!

Friday, November 15, 2019

Christmas Wreath the Maymay way

Its beginning to look alot like Christmas here.  We have had record cold temps and SNOW!  Ughhhh.  It sure has put me in a happy/sad mood.  Happy because I love decorating for Christmas and sad that we never really had a fall.  I plan on being gone over Thanksgiving which is when I usually decorate and Thanksgiving is very very late this year.  So with that in mind I decided to pull out my Christmas stuff early.  Plus as you could tell by my last post it's time for Christmas crafts too.  My Niece-in-law (is that a thing?  N.I.L.?)loves coming over to craft and earlier I had seen a "maymay made it" tutorial on a paper wreath.  Looked so cute so I went out, got some paper and waited for Liz to come over to craft.  Here's a link to maymay's tutorial HERE

I was at Michael's the other day and they had these 6x6 paper pads for $5.   They were double sided so it was perfect for this project. Now just a word of advice...these pads are by Recollection but not all their Recollection pads are double sided.  So you need to check the inside first.  I never noticed and just assumed.   Just a little buyer beware.  I bought what I thought were 5 double sided pads but I only actually flipped through just 1 pad while at the store and ended up with 2 pads that were single sided.  Anyway........ My N.I.L. works at an animal hospital and I saw this cute paper pack that just screamed "BUY ME".  So I got it for her and I went with more traditional papers for me.

Maymay used 12x12 sheets and cut them down to 6x6's but this worked for me.  We used cut aparts instead of stickers but basically followed Maymay's directions.


Aren't these cute?   The whole project only took about 2 hours and a few mini glue sticks.  

Enjoy and til next time
HAPPY CARDING!

Thursday, November 7, 2019

CHRISTMAS TEACHER THANK YOU

Well I've been quite busy lately closing up my summer place and trying to help the grandkids with their Halloween stuff but maybe now I can get crafting.

As the Christmas season creeps up on us we are all looking for simple little thank you's to give to the mail man or Teachers or even that UPS driver who is delivering like a million packages to our houses over this season.  Since there were many thank you's I wanted to make I needed them to be quick and easy and I wanted them done yesterday!  LOL  I'm usually "A day late A dollar short" kind of gal but this year I wanted to be more prepared.  I saw this on Pinterest (of course .... my favorite place to be! LOL) and then forgot to PIN it.  But it's easy enough to figure out so I just jumped in.  Little Coffee mugs that require no dies!  ! sheet of 8.5 x 11 paper will give you 2 mugs and handles.  You then need just scraps or a solid sheet of card to punch out circles for the bottom of the mug.  That's not to say you need a punch.  This could easily be done with just a square cut out of cardstock too.  So here's what you need.

1 sheet 8.5 x 11
1 sheet solid cardstock or scrap
paper trimmer that also has a score blade
2" scallop or round paper punch is optional


Cut your paper to 8.5 x 4.75 (cut 2 pieces to get 2 mugs from same card stock)  With the scrap piece left over cut 2 pieces 4" x 1" for handle (1 piece per cup)
With solid piece cut one 2" circle or with trimmer cut a 1.75 x 1.75 square for bottom of the cup.  You can also (as an option which I did) cut you handles from the solid piece of card stock instead of using the same pattern as the mug.

With the short end of the 8.5 x 4.75 at top of trimmer score at 1".  Turn and now with the long side on the top score at 1", 2", 3", 4", 5", 6", 7", and 8".  At the bottom cut the 1" score lines to form flaps.
I used a jar to make sure my flaps glued evenly.


Fold all the score lines and glue flaps to form mug bottom.  I added the little circle or square to cover the bottom completely.  On your handle pieces score 1/2" on both sides and fold.  Glue these to the side of the mug for your handle.  I filled these mugs with Christmas Shredded paper from the Dollar Tree.  Michael's also carries these.  I added a little tea bag and a honey stick and a small chocolate.  Place into a Cello bag and tie it up with a ribbon.


I think many people are going to love this little treat.  Hope you all enjoy making these as much as I have.

Til next time.................
HAPPY CARDING!

Monday, October 7, 2019

Another Halloween House Mini Album

Well I have got to say these houses are addicting.  I keep wondering how many people are going to receive these from me this year.  They are a bit time consuming though and writing directions aren't really working since it seems like each one I make is a tad off in size.  So instead I'm just going to give directions for base and roof.  This can be made in 2 sizes.  On my last post it was a smaller one where you can use just 1 piece of 12 x 12 for the base.
With Heavy card stock cut a 12x12 sheet in half and score on long side at 3, 6, and  9.
On the first and 3rd section measure down 1.5" and tic mark.  Then on top measure in 1.5 and tic mark then draw your roof points.  Remove the piece between the pointed pieces in section 2 & 4.  See below. 
With remaining card stock or a piece of scrap which is what I used cut roof to measure 4x6.  Score in half on long side.
Now time to decorate. Ribbon was attached before Halloween paper is adhered to first and last section to hide ends of ribbon.
 Cut all your papers about 1/8" smaller than the base.  I distressed all the base edges with Tim Holtz walnut.  I also used various dies to give me doors, fences, benches and paper punches for the bats and the edge of the roof.  My pumpkins I fussy cut from a 12 x 12 sheet of pumpkin paper.  They look so cute.  The angle pockets are hand cut and a corner die was used to decorate it. 
I just slipped a few ephemera's into 1 pocket and a couple fun tickets in the other.  Pictures can be placed on the undersides of the waterfall.
  The waterfall was super simple.  I cut 3 pieces 2.75"x3" scored 1/4" on long side.  folded edges were layered above each other for waterfall.  

Now for the big one.  You need 2 pieces of 12 x 12 if you want to make it simple.  Cut 1 piece of 12 x 12 down to 12 x 8 and then score at 4, & 8.  In sections 1 and 3 measure down and across 2" and drawn points.
From second sheet cut 1 piece 4.5" x 6 and score on short side 1/2".  That will be attached to the previous piece so that when your house lays flat it will measure 16" long.  Out of the second sheet you will also cut the roof or use a different color scrap as I have above.  It should measure 5" x 7.75" and score in half along long side.
Once again measure layers about 1/8" smaller than house. 

Here's the inside of the bigger one.  The corners were decorated with a corner die and one of them I had made a mini mini album to slip inside.

The Mini mini album has a few solid pages to put some wallet size photos in it.  Then here's the outside decorated.
I used all sorts of dies I had buried in my craft room.  The door, and bench are Spellbinder dies.  The pumpkins are all fussy cut from a sheet of scrapbook paper.  The bats are foam stickers from the Dollar Tree.
Here's both houses together.  Just let your imagination go wild and decorate.  There are so many fun papers out there.
To be honest I really like the little one better.  I think it's a cuter size.  A plus is they both fold flat to put into an envelope.

Enjoy and til later
HAPPY CARDING

Saturday, October 5, 2019

Halloween Mini House Album

Fall Is here.  Our leaves haven't changed yet but I'm busy decorating with all my fall stuff.  I have just returned from a Girls crafting weekend with friends and we made some awesome fall items.  I showed them how to make my toilet paper pumpkins as well as the sewing ones and they loved them.  2 of the gals brought alot of cards to make and one even put together all the pieces for us to make a House mini album  Shown here some opened and the rest closed.  They fold right up to be placed in an envelope.
These measure 4 x 8 at the peak.  I decided that they would look real cute using Halloween papers.  I was also disappointed that she fussy cut everything out when I was hoping there would be a die.  I decided to make mine a bit smaller.  Mainly because I have limited Halloween paper and because I wanted to have the base of the house all one piece plus the roof instead of 2 pieces plus the roof.  I made the waterfall to hold a couple wallet sized photos.  A few photos could be tucked into the corner pockets too.
Here is the front and 1 side and the next photo is the back and the other side.


The total size of this is 3 x 6 at the peak.  Here it is opened.
I think I'll give this to my Daughter in law for her mantle.  I think it's pretty adorable and I'm off to try it again as soon as I get more Halloween paper.  I probably should right down directions too.  lol

Til next time
HAPPY CARDING

More Pumpkins

Hello again.  I got some more pictures of the pumpkins I've been infatuated with.  lol.  I wanted to talk a little more on the sewed pumpkin.  First of all any fabric will do.  Don't worry about what the print is as long as it has fall colors it will work.  My fabric choice was some scrap in my bin and in all honesty it was ugly but the colors were right.  Cut a circle about 12 to 14 inches in diameter.   I used a charger plate as a template and ran my rotary cutter around the plate.  I then used crochet thread and sewed a running stitch all along the edge.
 Gently pull the 2 strings forming a ball.  Before it gets too tight stuff it with polyfil.  Then pull string tight closing the hole.  Type a double knot to secure and trim ends.

Then with jute or twine wrap around the ball to form segments of the pumpkin and the off on bottoms.  Add a stick to the top with some hot glue to secure and then add a few leaves and a bow from jute or ribbon.  Either one would look cute.
And voila....ugly material = cute pumpkins. 

I also found these material prints and the pumpkins turned out so cute.  You can also use old flannel shirts.  If you use the sleeves you can get smaller pumpkins.  But if you do choose to use the sleeves remember you need to do a running stitch on both ends of sleeves.  Cut straight across shoulder area and then about 6" down cut again.  On 1 end do running stitch and completely close up the end.   On other end do running stitch as above one, stuff and then close up.  Use jute again for segments and twigs for stem.  You'll soon be making an entire basket full of these.  Try sweaters, socks, etc.  Let your imagination go wild.

Til next time
HAPPY CARDING

Saturday, September 21, 2019

Lollypop Scarecrows

So I'm pretty sure many of you have seen Maymay Made It you tube videos.  I just love that girl and her ideas are fabulous. So about 2 weeks ago ( I  need to find the link) she had these adorable Scarecrows she made to put over lollipops.  They don't require a lot of supplies either.   Here's the first one I made for my sample.
You need a piece of paper 1 3/4" x 6" scored at 3" any solid fall color
2 pieces 3/4" x 1 3/4" dark gold for straw hair
1.  2 1/4" scallop circle double sided falling pattern for a hat.
1.   1 3/4" circle in a cream color
1.    1/2" scallop circle can be gold to be turned into a sunflower for hat
Black stickles, thin black marker, Orange color pencil
Maymays  Pun kin head stamp set ( or you could draw your own faces)
Lollipops any flat kind will work.
Twine

You can watch Maymays video HERE  You'll want to watch for details as I will just be giving you basics.

Fold the long solid piece in half on score line.  Using either a ticket 
punch or a large hole punch clip each corner.
Any corner clip would do actually.  Use what you have as they will still turn out cute.
On the cream circle draw or stamp the face.  With large scallop isolate 3 scalloped and cut doen about 1/2" on either side.  Then 2 scallops away from cut you will remove those 2 by cutting to 1st cut line forming a hat top shape.  Best to see video.  Then roll the brim up and glue.  On 2 small dark gold pieces fringe the long side on both pieces. Attach both across bottom of the hat brims back side with glue.  When set attach with glue to the face.
As pieces dry you can make the loopy bow from the twine.  The sun flower can also be made by cutting to center between 2 scallops and gluing 1 scallop to the one next to it.  A dot of black stickles  was used for center.  But a sequin or tiny button can also be used or maybe even seed beads if you have those.  Glue flower to side of hat and bow to bottom side of face.  When all is dry, glue face to folded cardstock piece.  Place a sucker inside and glue bottom shut.
Here's some variations I have done.  First I made score lines in both directions to give body more texture.  The one on the right I used a crimper for.  Detail lines wth fine tip marker added to face, hat and flower.  I also punched a small hole in middle of the fold on the body so my suckers slide in from the bottom and I glue the top closed instead.
Have fun...they are so cute.  To speed up time you could use hot glue but I didn't want to mess with the glue spider webs lol.
Til next time
HAPPY CARDING