I chose to have the wings close towards the back but you can also have them close to the front. In which case you would be covering part of the front panel. Since this is a sympathy card I did not want the words to be partially covered so I folded the wing part back. When folded this card is a standard size of 4.24" x 5.5"
Signing the card can be done either on those inside white panels or on the back panels.
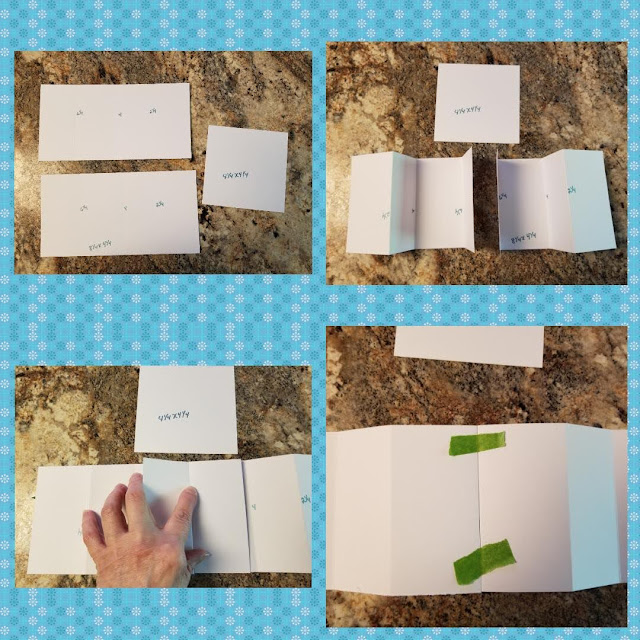
For the base pieces you need 2 pieces of card stock cut at 8.25" x 4.25" and then scored at 2.25"...4"....& 6.25". You also need 1 piece of cardstock cut at 4.25" x 4.25". For layers you will need the following:
1 piece 4-1/8" x 4-1/8" solid
1 piece 4" x 4" patterned
2 pieces 2-1/8" x 4-1/8" solid for out side wing pieces
2 pieces 2" x 4" patterned for out side wing pieces
2 pieces 1-5/8" x 4-1/8" solid for inside panel
2 pieces 1-1/2" x 4" patterned for inside panel
Center inside panels do not have layers unless you choose to do so. Here are some pictures on how to assemble the base. Photo steps are top left right then bottom left right.
Both pieces are folded exactly the same but when assembling you will flip one so that the larger 2.25 sections are on the ends. I held the middle on the back together with a little tape that I removed later. It just makes it easier. Watch the video for more details.
For the photos I used an orange piece for the 4.25 x 4.25 piece and I also outlined the edges on the white cardstock a bit since white on white is hard to see. This is just to give you an idea of where the pieces are suppose to be lined up and glued down. Again the video helps.
Then remove tape from the back and add your layers. It's a beautifully easy card and I plan on making quite a few.
\Til next time............................................


Susan, you are so talented! This card looks fabulous and your detailed instructions make it easier to re-create. Thank you!
ReplyDeleteGreat card, thanks for sharing a new card idea
ReplyDeleteWhat an awesome fold to showcase all your gorgeous papers, Susan!! I have not seen this fold before!! I do believe I will be giving this one a go!!
ReplyDeleteWhat a beauty, Susan!! I love this stunning sympathy design!
ReplyDeleteLove this. Can't wait to give it a try
ReplyDelete