TIPS AND TECHNIQUES

Saturday, February 26, 2022

HAPPY BIRTHDAY FANCY FOLD REPEAT

A couple posts ago in the Valentines I shared with you a fancy fold that I copied from a group who recently held a little virtual Stamp Camp.  I absolutely loved this fold.  Darlene never did mention if this card had a name so I do not know what to call it but I wanted to give it some sort of name so I spent a few days searching Pinterest looking for a similar card.  I have not had any luck so I commented to Darlene in hopes she will get back to me with a name.  Until then I guess I'll just call it a side Pop Out card.  Again here is the link to her card.

The World According to Bijou

This time I needed a birthday card for my grand nephew.  As usual I waited until the last minute.  It won't be going in the mail but my son will be picking it up today and dropping it off at my nephews house where they are having a Birthday party for his son.  With today being super chilly here in the Northwest I am loving the springy colors of this fun card.


Since I was rushed (as usual, I think it's my M.O.  LOL) it is hard to see that I had used the Mother Goose collection from G45 as my designer paper.  The sides of the pop out part are the reverse of the stripes which is Humpty Dumpty.  I had a scrap of this yellow and white zig zag paper from an old Recollection paper pack that I used for the balloon which I popped up 4 times.  I also used the same zig zag paper for the words Happy Birthday to tie it all together.  When flat the card measures 5" x 7".  I really love this card and can see me using this style over and over again.

Well that's it for now.  Til next time.....................

HAPPY CARDING! 

Friday, February 11, 2022

Little twist on a Wonky Cut

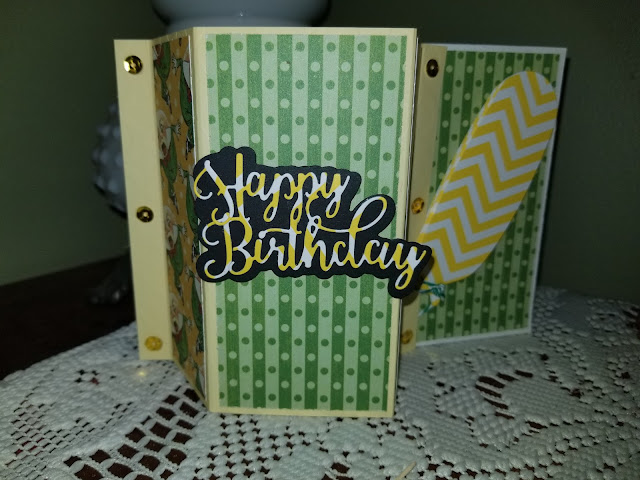
 I still have time to squeeze in one more Valentine and this time decided to do a little twist on a Wonky card inspired by Alisa Tilsner.  Hers was very pretty and springy with a yellow base and some beautiful butterflies.  I wanted to make mine just a tad bit longer to become a Slimline card.  Also with it being for Valentines day I wanted a little bit softer lines so I curved the top of the card and curved the entire left flap. The rest of the card is kept basically simple in design so if you need to make a few they can be whipped up quickly.  I made my sample with measurements in solid cardstock so you could see that you could also use solid cardstock instead of double-sided cardstock. You decide.  There are no rules. 

To start with you need a piece of Double-sided cardstock 9" x 9.25". For the sake of a template photo I am using solid cardstock but my fancied up card was done with doublesided cardstock. On the 9" side make a small tick mark at the top at the 3" and the 6" measurement and at the bottom a tick mark at the 2.5" and 6.5" measurement.  Then score from the 3" tick down to the 2.5" tick and then from the 6" tick down to the 6.5" tick.  Fold the sides in.  The bottom of the card is not flat.  Neither was hers so the card did not stand but I chose to mark a straight line along the bottom and square it off so that the card when opened would stand on its own.  I then curved the sides just to make it a bit softer looking.  I'm sure a border punch could also be used and could have a very pretty effect too. Here's all the markings without the sides being curved.  This is exactly how her base card looked in photo #2.


Because the bottom is not straight the card topples over when you try to stand it so I decided to mark a straight line across the bottom and cut it off.  This actually helped in 2 ways.  #1 it allowed the card to stand up and #2 it allowed the card to fit in a standard legal size envelope.  Perfect sized Tall Slimline card.  Below you can see the pencil mark where I drew my line.


For my Twist I used Doublesided cardstock and I curved the sides of the card.  I believe the original card used regular card stock measuring 8 1/2" x 9" so the card was shorter than my 9 1/2" x9" piece that I used.  My finished card after adjustment to allow it to stand is a card that measures 3 7/8" x 9 1/8"


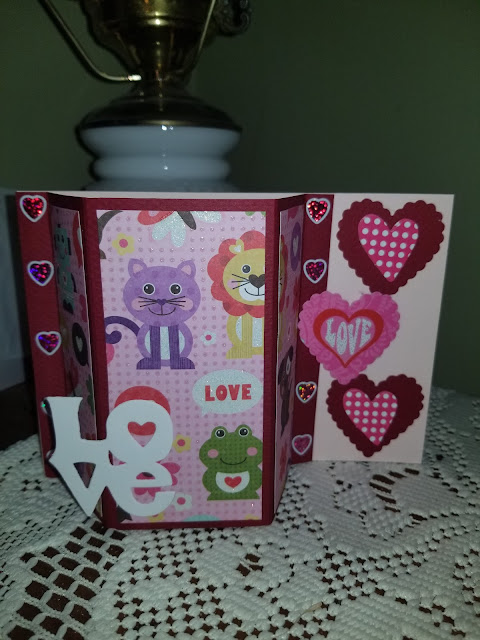
Then as far as my template card...well on Wednesday we have family dinnerr night with the grandkids coming over and this week the youngest (5) wanted to do a craft when she saw my card stuff on the dining table.  So I told her we could make valentines because Ama has to finish a card.  Well she told me what I could put on mine and I had to stick with purple fun foam hearts.  I had to beg to use a stamp for the Happy Valentines Day LOL.  Anyway I thought I'd share her 2 cards too.  My sample with solid card stock is the middle card.


I also got scolded for using the pink heart but she finally said it was ok but don't use red.  Bossy!  hahahaha.


Well that's it for now.

Have a wonderful Valentines Day and..................................................

HAPPY CARDING!

Monday, February 7, 2022

FANCY FOLD VALENTINE

 So decided to try another fun card.  I saw this on on Facebook in the Lets Make Cards group.  The lady who shared it said she found in on the internet but there were no directions or measurements, and it was in another language.  So she fiddled around and figured out how to make the base for a       4 1/4" x   5 1/2" card.  She shared those measurements in her group of photos which was so very kind of her.  Making the base was a breeze following her measurements.  Now the layering was a totally different story for me.  Apparently I am not very good at adjusting measurements for layers.  Ok that's an understatement!  I TOTALLY stink at adjusting.  I was so excited once the base was done and it folded correctly and even stood up unsupported!  Yay for me!  So I figured I would follow the same base but 1/4" smaller and instead of scoring the lines I would cut them.  Sounded right to me.  WRONG!!!  Now a smart person would have tried all this with copy paper but Noooo....I used my designer paper.  Then tried to trim it, messed it up got another sheet.... tried again.... messed it up... got another sheet... almost got it... got another sheet...fine! This is going to have to do.  Ughhhhh.      Ok I think I will only be making 1 of these cards until I see some brilliant person on Pinterest who has a tutorial with exact measurements for the layers making it super duper easy so I don't have to try and think.  I don't think my brain knows how to think anymore lol.  So anyway, here's my card.  Sorry no directions because it would be a huge cluster mess.  Although if you would like the measurements for the base, I can do that.  LOL


And now here's the base.


Now if any of you figure out the measurements for the layers to make this card any easier I'd be thrilled with your imput. 


Til next time............................

HAPPY CARDING!   

Friday, February 4, 2022

Valentines! YAY

 Hi...it has been along time.  I know!  No excuses because none would seem genuine enough no matter how truthful except that I just didn't feel like it.  How's that for the truth?  But boy have there been some amazing stuff out there in "Internetland".  Thats a place you know lol.  Well first I was inspired to do a few Valentine cards from a group called Lets Make Cards on Facebook.  I've belonged to this group for quite awhile and the people on there post some amazing cards.  I don't post many of mine but I do leave comments to the amazing ones I see.  One recently was made by a woman named Darlene Felicotto (in case your part of the group and want to see hers) she had an older Stampin Up pad she wanted to use up and created this beautiful card.  Now hers was a regular 4.25 x 5.5 and I decided to turn mine into a Slimline which is my new obsession lately. The card is a mini slimline and measures 3.5 x 6.25.  I used an old Martha Stewart doily punch under the hearts and the word Love was an old Sizzix thinletes die (those flat red things) or are those sizzlets?  The hearts are from a fiskars scallop punch I had.  Love using old tools and punches.  They are a favorite go to.


Second inspiration came from some friends of mine.  They do this virtual stamp camp (I do not lol) and they did a fancy fold card that I thought was just so darn cute.  Here's a link to the blog of the woman who provided the card instructions.  The other ladies who participated and shared their cards are linked in her blog.  Check them out as they all made totally different looking cards.  Great ideas.

The World According to Bijou: January Mini Stamp Camp - Day 4

I decided to make mine for my granddaughter for Valentines day and she loves animals so this is how mine came out.

This lays totally flat for mailing and the flat size is a 5x7.  I really like the way this turned out and I think I'm going to make another for my nephew and change it up a bit for an upcoming birthday too.  I love how different you can make one card design look and fancy folds are always a hit.  A big thanks to my friend for providing the link to the instructions so I could make one of these awesome cards.  Like I said check out her blog for instructions and be able to see a few more amazing ideas for doing this card design as she has the other (four I think) participants links on her  post that will take you to their creations.  So worth it.


The next one is one I saw on Splitcoaststamper.  Its called a Triple Fold Card and was posted in November of 2020.  Super quick to make and super versatile.

I sure hope you liked my "Pushed through" Valentines.  I still have more to make and less than a week to do so if I intend to get them in the mail.  LOL


Til next time...........................................

HAPPY CARDING!