Well the weather here is horrid. We have had some mighty snows and now actual temps of -24 with wind chills of -56. You would think I lived in Antarctica. But no I'm just here in the Midwest where we usually are able to enjoy the seasons as they change. No enjoyment now except that I can craft my little heart out. Which is exactly what I have been doing.
A dear friend has her birthday coming up and she was such a rock for me during some difficult times checking up on me and making sure I was ok that I wanted to make her a really special Birthday Card to show her how special she really is. So I decided to do a type of mini album but make it a card and not really an album. I saw a similar one on G45 but there were no directions so I just wung (is that a word?lol)it. I do not have any measurements and I truly don't think I will make another one of these. I used the Floral Shoppe Collection from Graphic 45. Well here you go. I photographed each page separately. It was so hard to keep this open so I had to hold it. Please excuse the fingers...lol
This is the front closed.
These 2 pages have pockets in them and I used the tags that came with the collection inside the pockets.
The next page has little corners added and the page after that is a half flip page.
On this side you can see how the flip page works and I repeated it for the next page.
Next is the reverse side of the flip page and another pocket page.
And now to the end. The next page has a side pocket and the last page has a bottom pocket that holds the sentiment card.
Below is how it stands up on the table. I love all the shapes of the pages. I wanted to make it look more feminine and not so boxy.
Thanks for sticking around and viewing all the pages. Hope you all liked it and I'm sure my friend will love it.
Hmmmmm...we still have more below 0 days ahead (at least another -27 tonight) so I guess I can go create a different Folio for my nieces birthday.
Till next time
HAPPY CARDING
Well once again I got side tracked. I'm suppose to be finishing up my paper pack of Christmas cards but instead I watched a Maymay Made it video on Valentines and couldn't resist. You can follow her tutorial HERE Her animals are sooo cute. I tried but failed at 2 of them. First I tried to change up the fox. Well hers is so much better. Then I had thought of a cardinal. I love cardinals and thought I could do one. Well you sure can't tell it's a cardinal but it maybe looks like a bird? Maybe???
I simplified the frog and the owl and the cat I changed up with funky eyes. I used the green McGill punch to make the fox and cats eyes, the unicorn horn, owls nose, fox and cats ears, and cardinals feathers. The Martha Stewart border punch I used the little confetti pieces we usually toss to add to the eyes of the cat, fox, and cardinal. The cardinals face was the Martha Stewart heart punch.
The pattern for the base of all of these is super simple and you can get 4 from 1 sheet of 8.5 x 11" card stock. Just cut all bases 4.25" x 5.5" and score on the 5.5 side at 2.75. Then at the 4.25 side mark the middle at 2 1/8th and cut diagonally to score line on both sides.
A strip of 3/4" x 4" is your banner on which you stamp the greeting and glue it only on the ends across the bottom. Have fun coming up with your own animals. These are so cute and quick to make.
Til later.........................
HAPPY CARDING
Wow what a day yesterday! I got together with my ladies group and we all had our Photo Play Mad for Plaid paper pack. After a cup of coffee and some yummy breakfast bread it was up to the craft room. Before lunch came we had made 20 cards. Pre-cutting the bases and having the mats and cut aparts ready it was pretty easy to assemble. We also seemed to have a glue vs tape runner episode going on.
I have been a big user of glue especially the one I get from (of all places) the Dollar Tree. HERE Though small in size (fits hands nice) it is a great quick set glue. I use it for everything. When lightly put on the edges of DSP it sticks beautifully to the cardstock but you have to be pretty precise because like I said its quick drying so not forgiving but it also holds embellies on perfectly. But for this challenge I decided to use all the tape runners I had scattered everywhere in my house. lol 2 of the other ladies decided to use tape runners too and the other 2 used glue. Here's what happened.
One of the ladies had this ATG gun Here I also had this one with me. She had 2 new rolls and I had 1 new roll. Well...................both of them got messed up so bad that we couldn't get the refills in to work properly then pieces of the plastic fell off and it was a hot mess. We literally ruined 3 rolls of 150 ft tape refills. So frustrating!! We had both chose this tape runner because of it's ease of use. Plus it fit so nice in our tiny hands. The ATG's that most people buy is just way too big for me and too awkward. I bought it first and the original new runner with pre-installed tape worked great for me and because of that she bought 1 too plus a refill. Big mistake. Then I also had a Theresa Collins Here This one got the glue from the tape all gunked up at the opening and prevented the unit to work. I cleaned it up tried again but it apparently got gunked up inside too and tape stuck to tape and locked up the gear. Another 100 ft down the drain. Next I had a Tombow stamp tape runner Here It worked great but was only 40 ft so I ran out quickly and it is also no longer available anywhere I have looked.😥😥 By this time I had no more options so I borrowed a bottle of the Dollar Store glue from one of the ladies. The other lady with the 2 rolls of the first tape runner switched over to some Ad Tech runners Here which she said she liked but they only had 8.75 ft. And then went through a few regular small Tombow ones too. And the ladies that used glue???? Well.........they only used 1 bottle and had no jam ups. Hmmmm...seems we tape runners lost this. lol Now I'm not giving up on runners. I do have a favorite but I forgot to pack that one. This one is my favorite at the moment. Here but its from Japan and takes awhile to get it so I always add in refills to my order. It has over 100 ft. Has not clogged up on me yet and small for my hands. I still love my liquid glue from the Dollar Tree and I do use both on my cards.
So did you think I forgot about the cards??? No not at all. I still have pictures to take and left over papers to use. I will probably work on that today. But here's a little sneak peek.
Joking we all said we should go home slip them into envelopes and address them. Then we have less to do over the holidays. heeheehee Maybe I will? Nah, probably not.
Til next time..............
HAPPY CARDING
SO I'm still working on my Big Christmas pack of cards and actually got my carding group to join in the challenge so with that being said I probably won't post The Paper Pack Cards post until after the weekend. In the meantime I have a Birthday card to share that I needed for this Saturday.
A while ago I bought the 8x8 pack of the Fairy Dust collection from G45. I'm not normally into fairies but I love the green and purple colors of the pack. So when I had to make a Birthday card for a friend I thought this pack would be a great one to use.
I wanted to do some sort of interactive card but had no idea what I wanted to do. You see there are 5 of us in my little group and for the birthdays I try to take 1 idea for a card and change it up 4 times so everyone gets a similar technique. For example everyone got a fancy fold of some kind for their Christmas cards. So I decided to go for a Mini Album type of Birthday card with little pull out elements. So this is what I came up with for this Months Birthday Card.
The card measures 4.5 x 6" All I did for the front here is glitter bits and pieces, punched some simple flowers from one of the papers in the pack and glitter it and place them on top of flowers that were on the paper. I added an extra mat to the cut apart card "Fairy Dust" and only glued it on two sides to make the right side able to hold the little charm on ribbon. The stamp pieces were glittered and placed on top of the stamps on the paper. Basically the front is just full of layers and glitter. LOL
The inside top has a little fold out booklet. Untie the ribbon to reveal a few pages adorned with little tags and Cut apart cards with sweet sayings on them. I popped up some little things here and there. Makes it look alittle 3d. Loving the mushrooms.
The bottom page I used a Tim Holts die called
Little cut apart cards slip into the slots. Again just alot of layering and glitter. That's one thing I love about G45. So many pieces can just be layered on top of the other creating such a pretty look. Time consuming? Yes......fussy cutting takes time but the results are so cute. And Glitter??? Who doesn't like glitter? Ok maybe some of you despise glitter but I love it as long as it's not loose glitter and its so perfect for Fairies.
I'm sure my friend is going to love this "Folio Card". Now to figure out another one for a February birthday. Then I have all summer to figure out the other 2 since 1 will be for October and the other December.
And of course coming soon will be the Christmas paper pack array of cards!
Til then .....................................
HAPPY CARDING!
Happy New Year. Did I say that already? I mean I know today is only the 5th day of the New Year but I already have a foggy mind as to what I have or have not done. lol
So I want to "Jump Start" 2019 Christmas cards and decided to due a challenge that I've seen on You Tube numerous time of seeing how many cards you can make from one of those Paper Pack Collections. Do you know which ones I'm talking about? The ones that have 12x12 double sided papers as well as cut apart sheets and a sticker sheet. I really should have taken a picture of the pack I'm using but nooooo...I jumped right in and started cutting things up. Including the cover sheet. I did find this picture on line though.
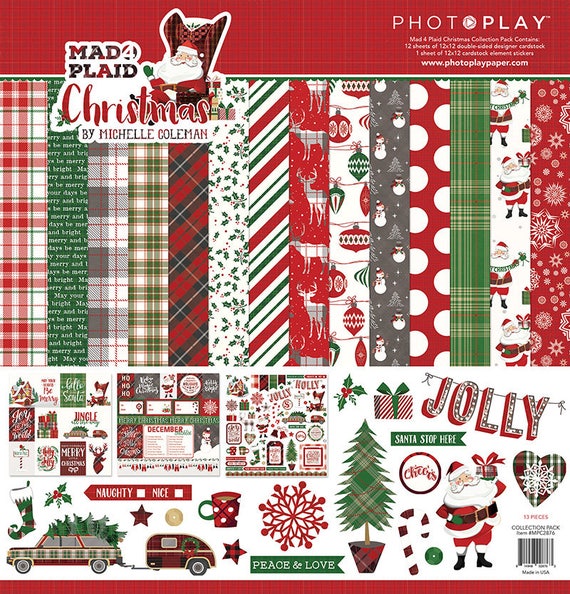 I will be using some solid card stock too for layering, though I'm not doing much and for stamping. Black, Old Olive and Cherry cobbler were my choices and all will be put on basic white cards in various sizes. I want to make all these cards very basic. I want them to be pretty flat too so I don't plan on using regular dimensionals. if I raise up anything it will be with that super thin fun foam from the Dollar tree. Its like 1/2 the thickness of regular dimensionals. To use as many scraps from this pack as I can there may also be some tags too. I had a hard time deciding which pack to use. There are so many out there. Photo Play as you can see won mainly because I already owned it but you should take a look at Carta Bella, Echo Park, and Authentique to name a few. They all have pre-made packs in 12x12's that are ready to be turned into some fantastic cards and tags. Oh I guess you could use them as Scrapbook pages too heeheehee. Maybe that's what they were really made for.
So stay tuned...I figure by the end of the week I should have accomplished something.
Til then ...............
HAPPY CARDING


