Another Halloween House Mini Album
Well I have got to say these houses are addicting. I keep wondering how many people are going to receive these from me this year. They are a bit time consuming though and writing directions aren't really working since it seems like each one I make is a tad off in size. So instead I'm just going to give directions for base and roof. This can be made in 2 sizes. On my last post it was a smaller one where you can use just 1 piece of 12 x 12 for the base.
With Heavy card stock cut a 12x12 sheet in half and score on long side at 3, 6, and 9.
On the first and 3rd section measure down 1.5" and tic mark. Then on top measure in 1.5 and tic mark then draw your roof points. Remove the piece between the pointed pieces in section 2 & 4. See below.
With remaining card stock or a piece of scrap which is what I used cut roof to measure 4x6. Score in half on long side.
Now time to decorate. Ribbon was attached before Halloween paper is adhered to first and last section to hide ends of ribbon.
Cut all your papers about 1/8" smaller than the base. I distressed all the base edges with Tim Holtz walnut. I also used various dies to give me doors, fences, benches and paper punches for the bats and the edge of the roof. My pumpkins I fussy cut from a 12 x 12 sheet of pumpkin paper. They look so cute. The angle pockets are hand cut and a corner die was used to decorate it.
I just slipped a few ephemera's into 1 pocket and a couple fun tickets in the other. Pictures can be placed on the undersides of the waterfall.
The waterfall was super simple. I cut 3 pieces 2.75"x3" scored 1/4" on long side. folded edges were layered above each other for waterfall.
Now for the big one. You need 2 pieces of 12 x 12 if you want to make it simple. Cut 1 piece of 12 x 12 down to 12 x 8 and then score at 4, & 8. In sections 1 and 3 measure down and across 2" and drawn points.
From second sheet cut 1 piece 4.5" x 6 and score on short side 1/2". That will be attached to the previous piece so that when your house lays flat it will measure 16" long. Out of the second sheet you will also cut the roof or use a different color scrap as I have above. It should measure 5" x 7.75" and score in half along long side.
Once again measure layers about 1/8" smaller than house.
Here's the inside of the bigger one. The corners were decorated with a corner die and one of them I had made a mini mini album to slip inside.
The Mini mini album has a few solid pages to put some wallet size photos in it. Then here's the outside decorated.
I used all sorts of dies I had buried in my craft room. The door, and bench are Spellbinder dies. The pumpkins are all fussy cut from a sheet of scrapbook paper. The bats are foam stickers from the Dollar Tree.
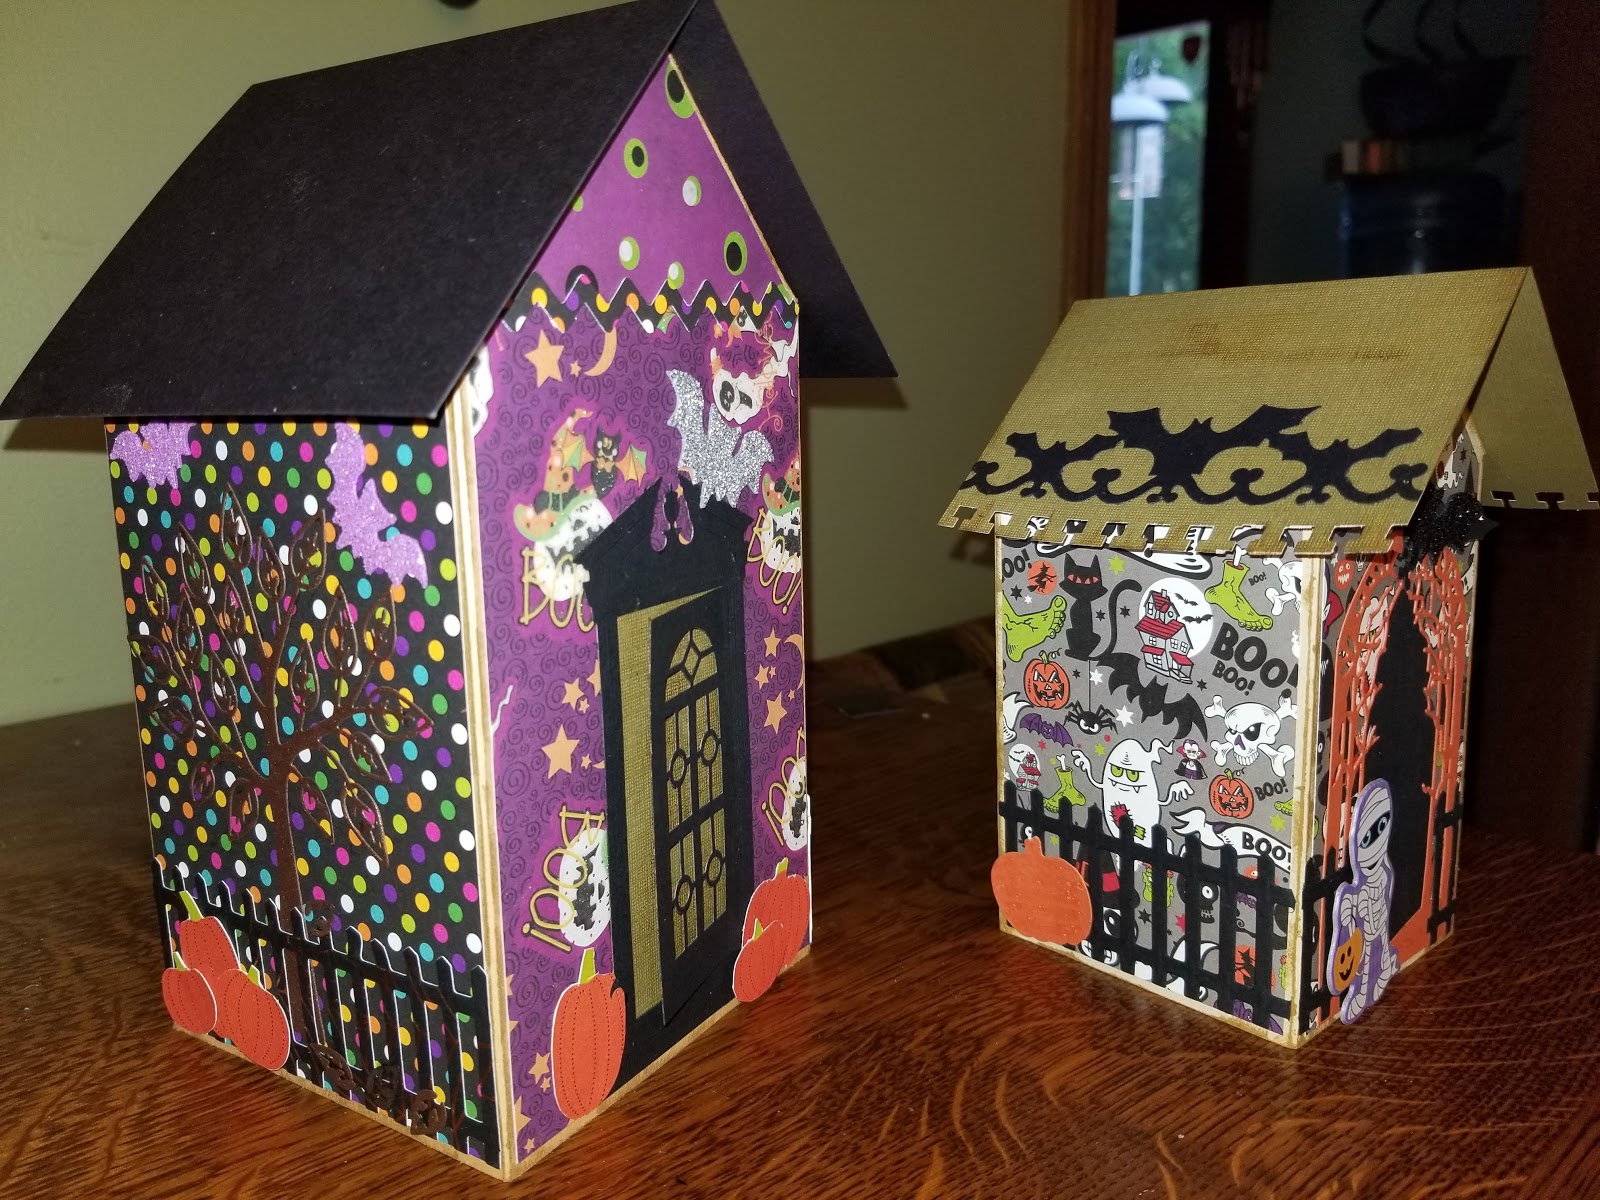
Here's both houses together. Just let your imagination go wild and decorate. There are so many fun papers out there.
To be honest I really like the little one better. I think it's a cuter size. A plus is they both fold flat to put into an envelope.
Enjoy and til later
HAPPY CARDING


Susan, you've done it again! You've WOWd me with your creativity. You are amazing!
ReplyDeleteYou are killing me, Susan!! Killing me!! How amazing are these delightful haunted houses!! The time and effort you put into every perfect detail of your wonderful projects put me to shame every time!! So, so awesome!!
ReplyDeleteGoodness- I stopped by before and was so mesmerized, I forgot to comment! LOL Your mini album design is so awesome- and I love your DP's too. And the houses- wowza!!!
ReplyDelete