TIPS AND TECHNIQUES

Thursday, July 19, 2018

Tips for Ultimate Genius cutting mats

I am always looking for the best way to use my Cuttlebug when die cutting.  One thing I hate is how warped the cutting plates get and before you know it as I run it through the machine it cracks and breaks.  Of course I never have an extra.  I then go to my Big shot and of course same problem ... warppy plates!  I go on to the Internet and follow all the advise out there on flattening the plates.  In the oven, under hot water etc.  Then of course there are the people who tell you that you are not rotating your plates right.  Jeez.......I just want to cut a die...no wonder I love punches better.  But I cannot get the intricate die cuts that are available from dies so I suffer through it.
Until now...............I had found at Joanns the Ultimate Magnetic Cutting system.
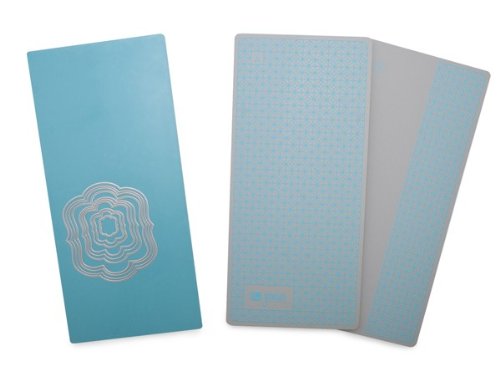
QUICKUTZ We R Memory Keepers Genius Ultimate Magnetic Platform
Its by WRMK and they are self healing cutting mats.  The box says you can use them in ANY machine.  So I thought I 'd give it a try.  They are a bit costly $49.99 but you can find them on sale and use coupons.   At the moment I am in love with these.  So much so that I'm afraid of ruining them or they will become discontinues.  So to extend their life I bought a couple of the Epic Grey Flex cutting mats.
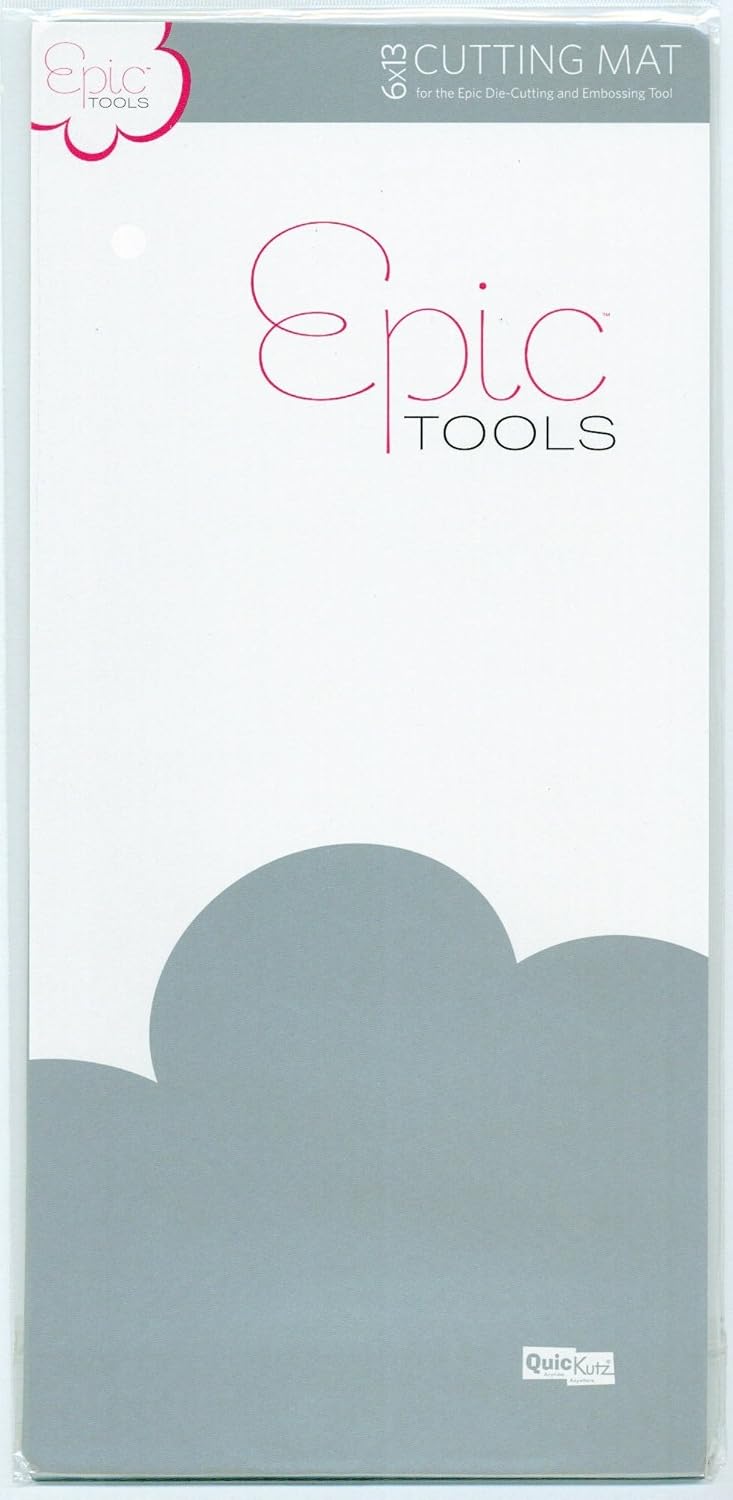
These are quite thin but quite inexpensive.  I use it with my B cutting plate from the Ultimate system and it works great in both my machines.  Though the Cuttlebug does the intricate dies much better.  Now  there is a warping issue with this Epic flex mat but even warped it runs through and cuts the dies with no problem.  I tend to iron my mat when done for the day and it flattens out with a hot iron and firm pressure.  At least they don't crack and I love the self healing aspect.
Now I am not suggesting at all that you need to go get these.  It works for me and I'm happy but I'm sure someone out there will have negative opinions of the product and that's their right.  I just wanted to share what is working for me and also share a pic of my warped mat and then after it is ironed.


Yep that thing just curls right up hahaha.  Its pretty flat now and ready to be put away until the next project.  


I still use the acrylic plates for emboss folders.

Well that's my personal review.  Hope it helps someone else.

HAPPY CARDING

Wednesday, July 18, 2018

Wedding Explosion box

I love weddings.  I love wedding decorations.  Everything is so pretty and lacy and EVERYONE Oooooo's and Ahhhh's the shower gifts including the wrapping paper used.  My Daughter in law is going to a double shower this weekend.  Previously I had posted the easy invites I designed for her. They were a big hit especially the brides mother which is my daughter in laws Aunt.  Poor woman has 2 daughters getting married not far apart so they had decided to do a double shower.  My daughter in law is involved with the decorating so we went through a ton of ideas to make the shower neutral yet bring in a little of each bride.  I helped with directions for her and her mom to make the centerpieces for the tables.  I just gave them a bunch of ideas and supplies and while I was up relaxing at my cabin they invaded my house for crafting.  One thing for sure my daughter in law wanted was a fabulously wrapped gift.  Her own daughter had bought small ankle bracelets for the brides in blue.  So when I was asked to come up with a fancy way to package them it was a no brainer.  We went with a Something Blue theme.  My daughter in law loved explosion boxes but needed the help to develop it.  So with color scheme (blue) and gift theme (wedding) and me with a ton of dies and ideas we made 2 of these.


The little box in the center holds the gift.  There is ALOT of gluing involved  I made little envelopes with added messages just for fun and little love birds are tucked here and there.   All together we probably used 3 sheets of blue shimmer 12 x 12 ...5 sheets cream shimmer 12 x 12 and 2 floral sheets 12 x 12.  I believe it took only 1 blue glitter sheet 12 x 12.  We of course have some scraps left over that could be used for future tags.
The main box its self is pretty easy.  Using 1 sheet of 12 x 12 score at 4" and 8" rotate and repeat.  For hearts in the corners I used a template, traced and then fussy cut the base corners.  I was then able to use a die to cut out the glittered blue hearts.  Dies are definitely my best friends!  LOL  I sure hope there is alot of Oooo'ing and Ahhhh'ing this Saturday at their shower.

Til next time
HAPPY CARDING!


GIRLS LOVE DINOSAUR 'S TOO

Do you ever notice that when it comes to making a kids card I turn into the President of last minute cards!   I wait until I absolutely need one before my brain even engages.  Sometimes my idea of last minute is a week or 2 before but for my poor grandniece I wait til I absolutely need it.  Last year I made a (by the seat of my pants lol) Rainbow card that I literally just slapped together.  I felt so bad because her mom normally saves all the kids I've ever made her kids and that one was not save worthy.  So for this year I knew in advance that she is all into Dinosaurs.  Absolutely LOVES them.  So I set out to find some inspiration on Pinterest.  I found a dinosaur I liked but it was one of those Svg (is that right?) files.  Well I don't have that type of cutter.  I'm a hand crank kind of gal.  But from the looks I figured I could do some Punch Art work on it.  I made it a large card 5.5"x8.5" so I could make a scene and not just have a Dino.  Sooooooo............Here it is!!

The body probably should have been more oval but it wasn't until I had it glued on and I sat back and looked that it hit me that an oval would have worked better.  My coconuts crack me up.  I layered a dark brown circle under a lighter circle the same size except I squished it up before gluing.  Ok looks NOTHING like a coconut but you get the idea and a 4 year old won't notice.  I'm just excited that I was able to get a card done for her and still have 3 days until the party!  Yay for me!!!  Pressure off.  At least for this year.

Thanks for stopping by and til next time...................

HAPPY CARDING


Thursday, June 21, 2018

Easy Invites

So good morning!  Its a rainy rainy day here and I have plans to make more tags since its a "stay in" kind of day.  But first lets back up to Tuesday.  I had my dining table all a mess with my paper stuff (I know....I have a craft room but it keeps escaping to the dining room Geez) and there a knock at the door.  Daughter in law walks in to use my paper cutter.  On her side of the family they are trying to plan a double wedding shower and her mother volunteered to make the invites.  Well ends up her mom just handed her a bag from Hobby Lobby and said: "Here I bought this.... can you print something on them?  I just want 5x7 flat postcard like invites."  Boy that's kind of general!  LOL
So my Daughter in law printed 5x7 invites, came over to cut them and then...hated how plain they looked.  So she said HELP!  With no money in the budget.......and thin Hobby Lobby card stock pack in cream I had to get the wheels turning.  PLUS....all 50 invites needed to be done by Wednesday............the next day Wednesday!!!  WHAT???  Oy Vey!
Here's what we started with:


 We at first thought that maybe we could just stamp a doily in the spaces to make the paper fancier.  It was not a "Bad" idea but it didn't seem enough.  Plus the paper was so...well paper thin and just didn't seem like a quality invite.  My daughter in law so wanted to impress her family with these invites so we had to work harder and I thought we could add a layer by using an emboss folder giving more stability to the card.  So we came up with this:


Still not exactly what she wanted so she jumped on to Pinterest and found a card with a doily type of gate fold.  Well there was no way we could make "NEW" cards.  Nearly all the paper had already been printed and the layer for the back had all been cut and embossed. (Yes I told her we should just do the cutting and embossing for 1 but....)  So I had this half die doily, and we were able to crank out 100 half's for the 50 cards.  That's alot of cranking!  haahaa.  We put it together by leaving a bit of an edge next to the doily so that it could be slipped in between the embossed layer and the front and then jute for closure.  Here's the final result.

So after 5 hours of cutting, cranking, and embossing oh not to forget inking all the edges and the embossed piece I sent her on her way home to assemble.    All in all I'm pleased with the result.  It might have taken all afternoon to figure this out but when all your given is a pack of cream paper with half of paper used for the print outs you can still come up with a decent looking invite.

That's it for now...........I'm going back to tags!

HAPPY CARDING!


Thursday, June 14, 2018

Tags R Great

Tags Tags Tags...my newest passion.  I have decided that our ladies group will be making a series of Tags.  All kinds of tags.  There will be Christmas, Birthday, Just because, just to name a few.  Alot of people don't send cards but they do give gifts and what could be better than a handmade gift tag to go with that gift?  So with out further ado lets get started.

Set 1 is Christmas.
TAG #1 and #3 Were made using the Pinwheel Punch Board by We r Memory Keepers.  They are both 3" x 6" Cream cardstock was used for the base on #1 and the DSP is by Graphic 45 Raining Cats and Dogs.  The Christmas Memories sentiment id a rubber stamp by Door County Rubber stamps.  Tag #3 was also made with the Pinwheel punch board.  This time it was kept super simple by just running it through a snowflake embossing folder and then having some silver ink swiped over the top.  The large snowflake was a Martha Stewart Punch and the smaller punches were punched from an old EKSucess punch.  The little red bow was a Tim Holtz punch.
The middle tag was made using the new Tag punchboard by WRMK.  Love this little guy.  The tag is also a 3"x6" black base and DSP was also G45.  The deer head and the sentiment was a stamp and die set that came with the craft magazine Papercrafts from the UK.  That flimsy doily under the deer is a piece of die release paper I had used with the doily on tag#1.  I saw no reason why I couldn't use it too.  I've done this in many of my cards when I use wax paper.  Then I saw this release paper that was printed and just had to have it and give it a try.  The paper really helps on intricate dies.
So those are the first 3 tags.  I'll be working on the next set and I can't wait to share those with you too.
Until then............................

HAPPY CARDING

Tuesday, May 22, 2018

Happy Birthday

With my granddaughters birthday coming I needed a few birthday cards.  Of course I only got 1 done but I did get a gift card holder card for my grandsons birthday in September done.  LOL  I really need to stay focused.  Someday I might learn that little task. heeheehee
The first card for my granddaughter is pretty simple.  I really don't know why I don't do more of these.  They are fast and mail easily
Then here is the one for my grandson. Super cute and simple too.


Now I just have to make sure I don't lose it before his birthday!  I may make a few more of these just to have on hand and if I do I'll jot down the scores and cuts in case you want to make a few too.  I can see using up alot of scraps with these.
Well better get back on track and get a few more cards done for my granddaughter.  Her parties are this weekend so I best get going!

Til next time
HAPPY CARDING!!!


.

Sunday, May 20, 2018

ALMOST UNICORN TIME

I have to laugh that here this is a card blog and I'm devoting this post to UNICORNS!!  My Granddaughter wanted a UNICORN birthday party this year.  The piece de resistance a "Sweets Table"!  We spent days on Pinterest picking out decorations and food ideas.  My dining room has been full of Unicorn stuff for months.  We are trying to do it on the cheap.  We are all about the D.I.Y!  So here's a few peeks.
First we started with the invites.  I ordered a unicorn die from Amazon and pulled out my large Sizzix cloud die   We had left over paper from her tie dye party last year so we used that for the back ground.  We made these a simple post card size.


Next came jars.  Candle jars, pasta jars what ever we could get our hands on.  Scrubbed off the labels and I painted them with just plain old craft paint.  I did use a sealer and only painted the outside.  I doubt if they will last very long but they will hold up for the party and that's what matters to me.  We plan on using them to hold straws (which we will have glued on them), suckers, pretzel rods dipped in white chocolate with sprinkles mimicking magic wands, utensils and whatever else we come up with.  I used my cricut to cut our=t these Unicorns.  I used the negative and some Mod Podge for the middle one sprinkling gold glitter. The Unicorn lost a bit of its shape when I glittered so I just used the black positive and Mod Podged it on the jars.
We also made little "Unicorn Magic Dust" necklaces for the girls.  I saw these on line and they were filled with glitter.  Well no way I want these girls having glitter...it would get everywhere so I opted for colored sugars.  This way if they do open them they will be non toxic.  The jars were only $3.99 for 8 and they were on sale buy 1 get 1 at Hobby Lobby last March so not a bad price.  We used ribbon I had laying around so no cost there.  All the necklaces are out in a purple jar that will be added to the sweet table.

She then wanted a guessing game so I decorated another Jar...filled it with Sixlets candies that I got during Easter (so we could get pastel colors.)  I did make a tent card indicating it's a guessing game and cut out extra clouds for them to write their answers on.  Winner gets the Jar of Chocolate Sixlets.
We needed little serving plates so I picked up 2 sets of candlestick holders at an antique store and bought some plates from Walmart.  I hot glued them together and when we are done the hot glue will pop off so we can use the candle sticks with different plates for a different occasion.  The Unicorns on top I got at the dollar store.

Another item on her "Perfect Party" list was a SELFIE Frame.  So...dollar store foam board...I cut a ton of flowers with my cricut.  My Daughter in law put the flowers together and decorated the frame.  Super cute!!

The ears were cut from the center of the foam board and some glittered fun foam was used for the pink of the ears and the lettering along the bottom.

As a craft activity my Daughter in law was going to have the girls make homemade slime.  Of course the slime will need to be put into a jar for safe keeping so she bought little 4 oz mason jars and I spent some time punching flowers.  I made the Unicorn horns out of gold glitter pipe cleaners.  Ears are made from fun foam and glitter fun foam.  Now the girls have a jar to hold their slime.

Now it is time to start some of the treats.  Stay tuned for some follow up photos after the party.  
It will be Magical!

Until next time.............
HAPPY CARDING!