I found it! I found the perfect stamp for my very first challenge of using 1 stamp for a card 12 times. Way back in my stash was a stamp I have not used in years. I have this cute little stamp store that carries very unique stamps. Alot are from the owners own creation and then she also carries the Northwoods Line. Oscar opened her store back in the late 70's I think and a childhood friend of hers just happens to be the owner of the Northwoods line of stamps. These stamps are so detailed. Some of the scenes look like paintings and require alot of coloring. I for one am not a great colorer (is that a word?) I don't shade well and never have great results but one stamp in particular does not require alot of detail coloring and that's the one I chose. The stamp is called "Two Raccoons in a Can" #M9035 and can be gotten HERE

I decided on this one because I thought I could use it for many different themes plus not alot of coloring. So lets start. For this first month I decided to make a Birthday card for my friend. I chose blues because I always think of January as being a blue month. First because it's usually quite cold and I'm always sad Christmas decor returns to normal.
So if any of you know me you know 3 definite things about my creative juices. One is I do not like to color which is why most of my cards are huge layered ones. Two is I do not like to "fussy" cut. If something has to be cut I sure hope there is a die for it otherwise I turn into a cranky pants. Finally three..I love to embellish. Choosing a stamp to use every month has multiple dislikes for me. Coloring and fussy cutting. Thank goodness I can still use embellies! So I decided to make it look like these raccoons are digging through the Christmas garbage to find something usable for a birthday. I even had the one little guys find a birthday card that he's holding lol. So here it is. Hope you like it.

I Heat embossed the image and then just added a hint of color with color pencils. The background paper already looked like sky so I just sponged some brown on the bottom for ground. The sentiment is a die cut. Oh how I wanted to use a stamp instead lol. The trash consists of chocolate foils, tissue paper and I cut little stuff out of the snack packages I give the grandkids. Though this was fun I know the challenge will be to incorporate raccoons every month. It will be an interesting adventure. Hope you all stick around to see how this ends at Christmas 2020.
Can't wait to share February's card.
Thanks for stopping by
HAPPY CARDING!
HAPPY NEW YEAR!! Can you believe it's 2020? The "Roaring 20's" have returned. lol So it was time to ponder. What do I want to work on during the New Year. I have never had a plan and I'm sure most of my posts will never be pre-planned but..............some friends of mine (card makers as well) always do challenges. I totally wonder how they ever have the time to do so many. One that has been really intriguing is done yearly by a fellow friend and blogger. She does a travel post where she looks up details of what ever her challenge is for the year. For example one year she did the states. I believe each week she chose a state, wrote some amazing facts and created a card that related to that state. The info she would share was always so interesting. Kept me coming back for more. Last year it was different countries I believe she called Travel the world which she is continuing this year. She and another group of gals are also doing a 1 stamp 12 times. You choose 1 stamp, only 1 and you it once a month on a card that you then post. Got me thinking I should try at least 1 type of challenge. I'm not good at being a joiner so I decided to do this on my own. I too will pick 1 stamp and use it on a card once a month for the next 12 months. So I have to get going and figure out what I want to use. This will not be easy for me since I really don't like using the same thing twice yet alone 12 times. lol Lets see if I can do it. I think I'll use a posting date of the 2nd of each month except for this month since I have just decided to do it. For this month the post date will be by the 7th. So hang on.............very first challenge is in the works. Wish me luck. And if your a teenie weenie bit intrigued about Travels around the world here's a link to her blog. HERE
Til Next time
HAPPY CARDING
Well Christmas is nearly here and I have all my cards mailed, gifts wrapped and food bought for the family gathering Christmas Day. Last year I swore that I would not be doing everything last minute and I succeeded. I'm so happy. Not stressed and very relaxed. So with 3 days left before the big day I decided to make some little treat boxes to put at each place setting. These are super cute as well as super easy. They kind of resemble a milk carton. Kind of between a bag and a box. A Bag Box! Anyway I only needed 12 for the adults and I filled them with little dark chocolate pretzel balls. YUM.
I tried so hard to make something for the kids table too but ran out of time due to a migraine. But the adults all loved the cute additions to our table.
Hope your holidays were fantastic and until later........................
HAPPY CARDING
In case you haven't figured it out yet, I have an obsession with making as many tags as possible from the tiniest scraps. Today's post is no exception to my rule. "Use all that you can". So when my granddaughter came over on the weekend to make tags for teacher gifts I was sure to save everything she didn't use. I had 6 sheets of 6x6 papers that she absolutely loved. It was left over from a pack I got at Michael's that my Niece used for her cone wreath. This pack was all about cats and dogs and my granddaughter loves animals. So much so that she volunteers at a shelter once a month and she's only 11. So proud of her. Anyway she made 11 tags from the papers I gave her. Yes I know that's alot of teachers, but she had also made the tags for her brothers gifts to his teachers and her sisters. My Grand daughter has a big heart and likes to give little gifts to the lunch lady, librarian, office workers etc. I looked at all the weird shaped and size pieces she had leftover and thought OK this is a challenge. You see when I cut paper I try to be as neat as possible and not waste space.....my granddaughter on the other hand just cuts right in anywhere. But I was determined to use those scraps. Ta Da! I got 37 various sized tags!


Now I know they are not fancy but these are Perfect for the kids gifts. I won't have to gasp as they rip the gifts open and throw away my little works of art. I should really make more of these ease up on my stress a bit. lol Let me tell you I used every bit of the scraps and still have 1 whole 6x6 sheet left. That's alot of tags from 5 6x6 sheets. Just imagine what you can do with your scraps.
Til next time....................................................
HAPPY CARDING
OMG I'm in love with a soldier!! A wooden one that is. I saw these all over Pinterest and LOVED them. Batted my eyes and I was able to get my darling husband to cut me out 8 boards and foot bases.
These guys are soooo cute. They are made from a 1x6x36 inch board and their feet are 4x4's cut to the same width as the boards. That allows them to stand at "Attention". My husband routed a little grove on the 4x4's to make it look like they were wearing shoes. I made stencils for everything that wasn't a straight line. Gold metallic pens are my friend lol. There was alot of gold work on my guys. I also found out that when you spray varnish over gold metallic paint pens it softens the ink and will smudge if you touch it. Good thing retouching was an easy task. These guys are gifts for my lady friends that I craft with. I can't wait to see how they like them. Rumor has it one of the other ladies is also doing a wood craft as our gifts. Sure hope we don't have the same ideas! LOL
That's all for now til next time
HAPPY CARDING!
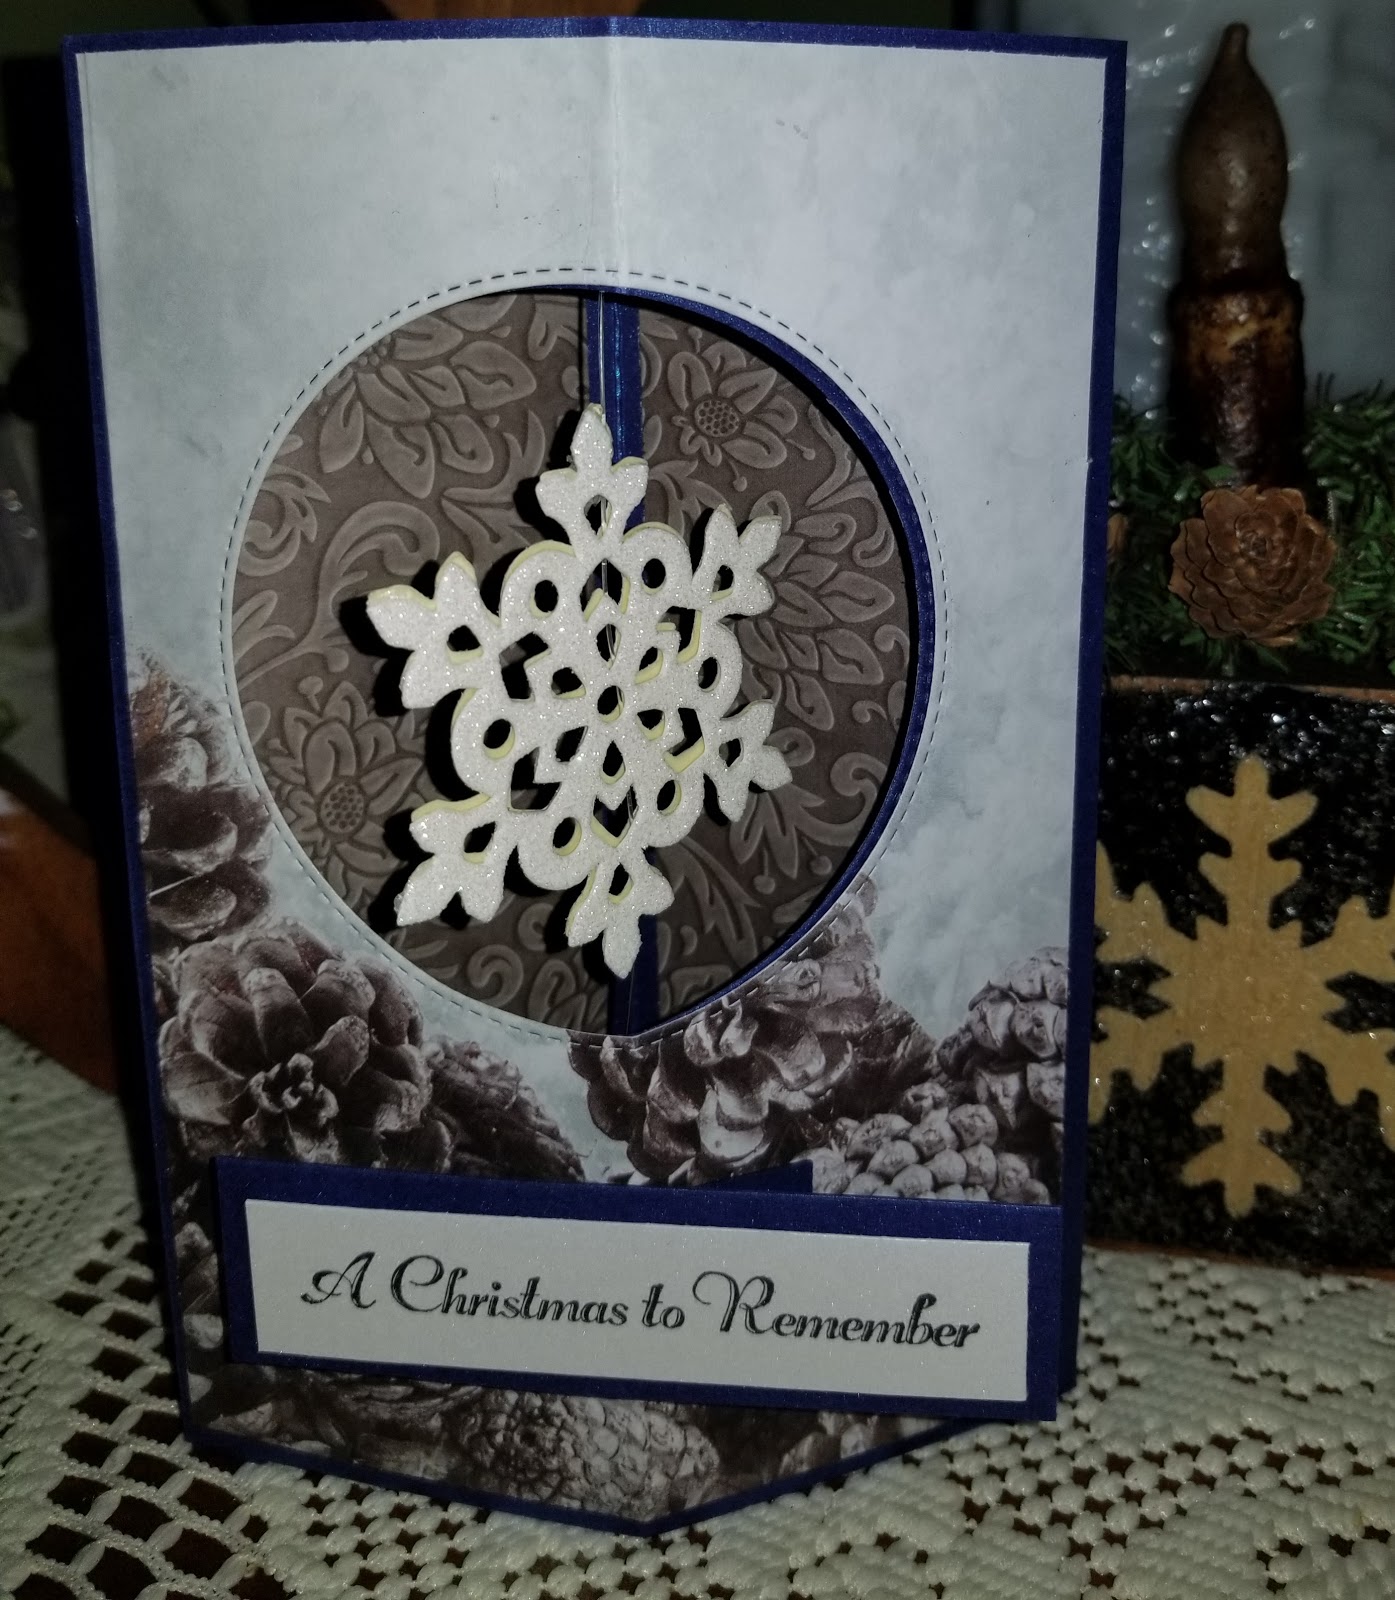
This year I had decided to get a head start on all my Christmas cards. On an earlier post I told and showed you all the cards you could make using 1 Christmas Paper Pack and I got alot from it. I think there were 60+ cards along with a large collection of tags all from the same pack. Well I had also decided that instead of whipping up a las minute card for my lady friends to go with their gifts, that I would be proactive and make their cards in advance too. I am so glad I decided to do that because I had found the most adorable card on you tube called the Elegant Spinner card. I made all four of my cards the same so save me from thinking this out too much.
Isn't this cute? The back of the card is where the sentiment goes and it all lays flat to slide into an envelope. The link to this tutorial is: HERE She explains very detailed and is easy to follow. Check her out. These cards are going to be the perfect addition to my lady friends gifts which I will share in my next post.
Til then
HAPPY CARDING