TIPS AND TECHNIQUES

Thursday, May 27, 2021

Special Card for a Special Guy

 Well today is the birthday of a very special guy.  He is the son of a special friend of mine and I just knew I wanted to make him a special card.  Have I used the word "Special" a bit too much?  lol  Well only they (and a select few) know how special they are.  Anyway as I type this it is his actual birthday but by the time I post this his day will be over.  That is basically due to some personal issues I had here and could not complete the card in time to slip it in the mail.  Plus I know the mom will see it here so I want her to see it first as her son opens it and not on my blog.  Anyway just a little back story on the card.  He loves ducks!  Frequently he goes with his dad to see the ducks so I knew a card with ducks would be the way to go.  But guy cards are so hard for me to come up with since I love pretty shiny things like bling and flowers.  I'm also more of a fancy fold type of gal so I knew the card would be one of those and I'm not a huge stamper.  I know......the horror!!!!  A card maker who doesn't stamp much!  I think I'm more of a "Papercrafter Carder".  Anyway back to the card.   Before the Pandemic I had visited my Tuesday Morning and I had found this stamp and die set.

Well I wasn't sure if I'd actually use the stamp part of it as far as the girl and the fence but I thought the duck or geese (whatever those are) could be used for something and they had matching dies.  Then in my box of dies I also had this die someone had gifted me.  Its a duck in water, no name die and no idea where she got it.  I asked but she said it was from a garage sale so sorry no info on that one.  So I mixed and matched and came up with this.

Not bad for a Guy birthday.  I might even do this again if I need a guy card.  

Now I need to get this in the mail A.S.A.P. 

Til next time..................................................

HAPPY CARDING!

Sunday, May 23, 2021

RECYCLE WATER BOTTLE TAGS

 Ahhhhhhhhhhhh.......WATER!!!!!  I love my bottled water.  I have a favorite water called LIFE WATER.  They have cute labels of are on each bottle and have this sippy spout on them.  I don't know what it is about a sippy spout but I'm obsessed with them.  The water is $1.00 per bottle and I drink ALOT of water so usually I buys 3-4 at a time then refill them with water from our filtered crock at home.  I know I know your not suppose to re-use the disposable water bottles but I wash and rinse and refill anyway and then replace every 2 weeks with new ones.  Any way I was looking at the bottle the other day and thought....hmmmmm....these labels are really really cute.  I wonder if I can peel them off????

Yep I can!!  Yay, now what can I do with them?  Why not make simple tags?  These will be generic, not fancy and no need to embellish because you don't want to take away from the beauty of the art work.  They're also an "All Occasion" tag so I won't mind making alot of these.


When I would cut out the tag I tried to cut it with the name of the artist still visible as you can see in the last picture.  Then just simple embellish the tag.  


Ok time for me to fess up.....I lost the original sample labels I was going to use to make the tags.  Did an impromptu clean up of the dining table and now I can't find those sheets. So I ripped the labels off of 2 new bottles and started over.  Geeze see what happens when you clean up your crafting mess!  lol

So...............First one I fussy cut the animal head then realized I cut off the ears.  Ugh. I framed out the artist name and put it on a little tag because on the label it was in a "sea of white".  On the second label the artist name was just Lil in the bottom right corner.  Though the label is sideways I didn't think that made much of a difference.  I had decided to run it through an embossing folder to see how it would look and liked how it turned out.  On both I used the word LIFE from the bottle label.  I felt it was generic enough to use as an embellie.

Cool idea right?  Of course now my water bottles are all plain.  LOL Guess I need to go buy new ones.  I love using one thing for another.  I did something similar a few years ago with beer bottle labels for guy tags and Halloween tags.  There are some pretty funky beer labels out there and if you know someone who enjoys craft beers you could have an endless supply of labels and bottle caps for tags.  Have fun!  I do have to add that these tags are inspired by my friend Lynn who was making tags a couple weekends ago for her church and got me thinking.  She is going to get a kick out of my recycle tags.  I don't know why more people aren't obsessed with tags.  You can use up all your scraps, load them up with embellishments, make them all different sizes, do not have to worry about postage because you don't mail them! Oh and if they are on your Christmas gifts, the tags can be put on the receivers tree as an ornament too!  DOUBLE DUTY GALS!!!!  Its like a perfect way to be super creative in the papercrafting world.

Till next time.........................

HAPPY CARDING

Thursday, May 20, 2021

HAPPY MAIL THANK YOU

 Do you ever end up with odd color 12x12 sheets of inexpensive cardstock?  I know I do.  The grandkids will have some sort of project that requires 1 sheet of yellow, 1 blue and 1 orange or something like that and I find at times it is less expensive to buy one of those small packs that Michaels has usually on sale that has maybe 5 different colors in it and 2 or 3 of each color.  Problem with that is there are always sheets that get buried away because no one needs them nor wants to use that color.  I myself usually don't use them because I can be a quality snob at times.  Well I finally decided these sheets need to be used and some of the easiest fancy fold cards are ideal for this weight of cardstock.

I wanted to have various Thank you cards available to mail out as Happy Mail Thank You's.  I belong to a card group where we share cards with each other and die cuts or stamp images on a whim and it's nice to send a thank you back in return.  I had found 3 sheets of this bright (almost neon) melon color 12x12 cardstock in my craft room and decided this would be a start to the:  

"Mini Slimline Screen Card"


You can get 2 cards from 1 sheet of 12x12.  Cut the paper 6 x 12.  Score at 3, 6, and 9.  Decide on a punch to use in each section to form the legs.  I used a little label punch which I centered in the bottom middle of each panel and punched.  I used on this particular card a Martha Stewart border punch across the top.  I chose to not add multiple layers to the cards because die cuts will be slipped inside and I didn't want added bulk so I only used 1 layer and that was cut 2 3/4" x 5".

These cards fit in standard security envelopes found at the Dollar Tree.  I'm going to be whipping up alot of these as well as some more of those Bridge cards I did earlier.

Well til next time......................................................

HAPPY CARDING!!

Monday, May 10, 2021

ALL OCCAISION BRIDGE CARDS

 Like many of us I just like to have various cards laying around to ship out when I need one.  I am notorious for being late on a birthday or a thank you or sometimes at the last minute I think hmmmmm I should send so and so a "HI" card.  But then never do because I don't have one cute enough already done and ready to go.  So I decided to whip up a few to keep on hand just for those moments.  So a really cute and simple one to do is a bridge card.  It sticks to my love of "Fancy Folds" and they are pretty simple to make.  This one is completed.


I used mainly scraps for these cards and some Dollar aatree sticker packs.  So heres what you'll need to do to make these simple fun folds.

Solid card stock for base: 4 1/4 x 8" score at 1 1/4", 2 1/2", 5 1/2" and  

6 3/4"

1 piece same cardstock for bridge 1 1/4" x 5 1/2"

4 dsp 1" x 4" I used doubled sided so I could switch the patterns

1 dsp 2 7/8" x 4"

1 dsp 1" x 5 1/4"

Then whatever embellies you would like to use.  As you can see I use what ever I have and I change them all up.  These aren't all done but you get the idea.  


These 3 I made with pockets and tags inside unlike the first one where I just stamped a sentiment and some flowers on some white paper.  My plan is to embellish these to have on hand but save the stamping until the card is needed so I can stamp for the occasion.  Stamping a bridge card that is already made is hard to do so that is why I chose the tag option.  Just pull it out stamp it up and slip it back in.  This is just one of my little tips.  Hope you like the card.  
Now I think I'm off do do some Tags.  My friend Lynn inspired me by saying she was making some over the weekend.  She will never believe the idea I've got so stay tune!


Till next time

HAPPY CARDING

Sunday, May 9, 2021

Double Z Fold Mini Slimline Card

 Hello!! I have the Graphic 45 bug!  They have there new line coming out and I am trying so hard not to want it all.  Never works out for me though because it is my favorite paper.  But I will admit I hoard it!  I buy it and just look at it.  I don't want to cut into it.  If I do then the sheet will be ruined and eventually gone!  Oh no the horror!!!  I will have to buy more!!  Ughhhhh......such a rough life right?

Well awhile ago someone on the Graphic 45 Facebook page named Karen Williams shared a card made with G 45 done in a double z fold and I thought ok ok I'll use some paper. Truth be told now I'm hoarding the card!  LOL  I'm not sure but I think hers was a regular sized card and I turned mine into a slimline card.

Have I mentioned that I love this line of paper? lol This is the Mini Slimline size.  All directions are in inches.
Here's what you need: 
Base cardstock 9x3 scored 1.5 and 3
       cardstock 6 x 1.25 scored 1 and 3
DSP (1) 5 7/8 x 2 7/8
      (2) 1 3/8 x 2 7/8
      (1) 3 1/2 x 2 3/8 and top layer 3 1/4 x 2 1/8 this is an approximate depending on the ephemera you decide to use.  Its ok if it's a bit bigger or a bit smaller.
      (1) 1 x 4 1/4  scored at 2 7/8
      (1) 2 7/8 x 3/4 optional

Now glue time.  This goes together pretty quick.  My original card I made from Graphic 45 Love notes collection but this one is cut from another favorite paper line of mine and that is Authentique.  They have such pretty papers and I love their 6x6mpads for my tags.  They also have these collection packs similar to G45 where you get a few sheets of 12x12 doublesided papers the Ephemera are usually on one of the sheets and there is usually a sticker sheet.  this collection that I'm using today is called DAME.
Now it's just time to fold and glue.  I glue all the layer on the pieces before I assemble the card together.  I find it easier that way and then I lay the pieces on top of one another to decide where they should all be put together.  That way ther is no mistake in the placement of the smaller z fold not being in the right place for the card to fold right.


Now that I've decided where to glue my pieces, I secure them and start my embellishing.  Usually my most fun part.  I do try to keep embellies more simple for cards that I will be mailing compared to cards I hand deliver.  Let me tell you I can sure get carried away with embellishments especially when it comes to Graphic 45. LOL  But this card will be a mailed one so it's one to keep simple. This will fit in those regular security envelopes you can get from the Dollar Tree so envelopes are easy to find.

Well that's it for now.  Hope you enjoyed this Slimline card.  I'll be having more Slimlines to come.  Funny I have been making this size card for years and NOW they have a name.

HAPPY CARDING!

Saturday, May 8, 2021

ILLINOIS STATE CARD

 Hello!  I'm sure we have all had this dilemma where we open our mouth and volunteer for something and then say OMG what have I said?  Well I had that moment.  I belong to a card group on Facebook.  I joined basically for hints and to admire all the works of others.  Once in a "Blue Moon" I would post a picture of something I did but very very rarely.  I would however make comments on others works of art on the beauty or creativity.  Well one of the things I noticed alot of these card makers doing were "State" cards.  I didn't quite understand it at first but then caught on that it was kind of like a game where you download a map of the USA states and then collect cards from each of those states coloring in that state as you receive the state card.  I would read and giggle as people were writing "I need OHIO!! I'll give you NEBRASKA!"  With thousands of members in this group there were daily requests.   Well this was not really something I was interested in but I sure did love looking at all the different ways people portrayed their states in cards.  I however barely have time for normal cards yet alone trying to keep up with that challenge.  Then.....................I made THE comment!  I told someone that the Dutch card she received was beautiful and I loved the look of the windmill. Well the creator of the card messaged me asking if I would send her and ILLINOIS card and she would send me a Dutch card in return.  She is from the Netherlands and just starting the State card collection.  So I thought what the heck I can do 1 card.  Well knowing that it was going to the Netherlands made me want to make it a bit more special and since I have a love for "Fancy Folds" I knew it had to be a "Fancy Fold".  So I opted for a Screen card.  Little did I know that making a specific State card was going to take me literally 3 1/2 weeks to complete.  I knew what colors I wanted but trying to decided what I wanted to embellish it with was so difficult for me because I wanted it to be informative yet not just written up on a sheet of paper.  I put out my feelers to 4 of my best talented friends (we have a little "Gang" we call JP&I) and got some great ideas from them as well as a few stamped images to help me along.  The card came out pretty good.


Now I was quite pleased with it and so was the woman in the Netherlands.  Then she posted it in the Facebook group we are both in that she received her Illinois card and all of a sudden I start getting messages from people needing Illinois cards in exchange for Iowa, Ohio, California, etc you get my drift?  Well I had to decline unfortunately as there is not enough time in my days to do that type of commitment and I have learned my lesson to keep my mouth shut lol.

Til next time...........................................

HAPPY CARDING

Wednesday, May 5, 2021

MYSTERY DIES

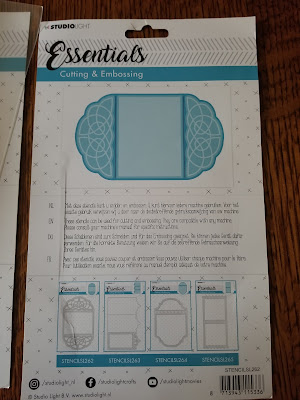
 Project number 2.  Do you ever see a card on line and say to self I must have that card die?  Yep me too.  Thus the search began.  I saw a card. on Pinterest.  it was in Dutch I think.  I did a screen shot because it was just a pic....no directions, no link to a blog, nothing.  Now you know how Pinterest shows you others similar?  Well it did but absolutely NONE told you how to make them!  All were only pictures!  Well I would not give up!  Finally.........................by accident.............while on Joanns website searching dies I came across a very similar die.  OMG heart be still.....how can this be?  Order Order Order!  So Joanns had no examples of these cards only the dies and I eagerly awaited their arrival.  Then they came.  So exciting.............................but.....................there are no instructions!   Here's what I got.


As you can see it's not in English and I don't really think its directions anyway.  So now to share with you the card I saw because I'm sure most of you are saying "well Susan its a gate fold card".  No it is not....here's the one I saw.  I'm giving you the pinterest link so I don't violate anything.

HERE

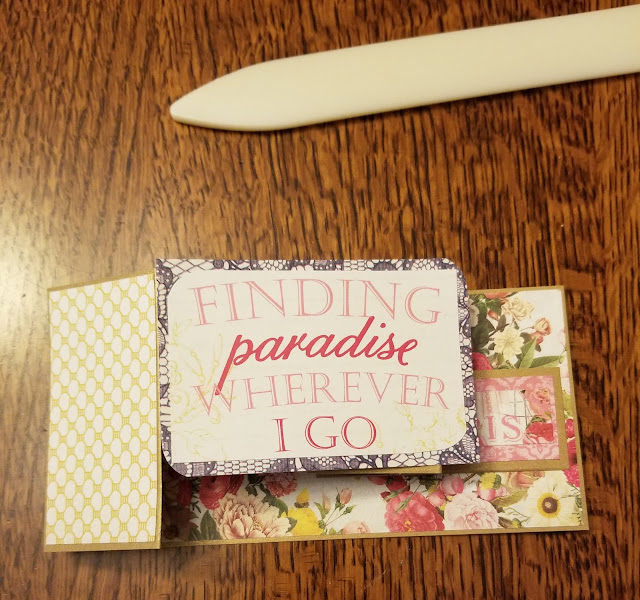
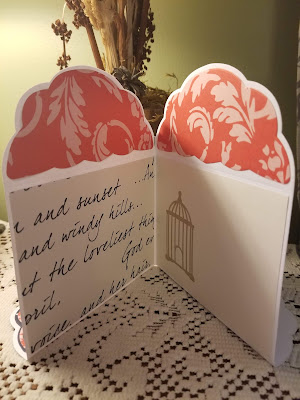
Now this one is in Dutch and just a tad different and the brand I bought does not have all the different styles I've seen on Pinterest so it may just be an international thing.  Any way I tried to make this die work as a regular open/close card but the only way to make it stand was to fold the bottom pieces to make flaps or it would just fall over.


It kind of reminded me of a mermaid fin but on both sides.  Then I decided to make it more like a post card which is ok except it needs some sort of stand if it is to be displayed.


Guess I'm going to have to really work with these before I get what I'm looking for.  Eventually I'm hoping to come up with something amazing for a Christmas card but we shall see.


Til next time..............................................

HAPPY CARDING!

Tuesday, May 4, 2021

EASTER TAGS

 OMG........I am so bad!!!!!  I cannot believe that I have missed the entire month of April!  So this post and the next couple are going to be catch up ones.  Short in words and just a couple pictures in each post.  I'll start with my favorite thing to make TAGS!!  I had played alot back in Mrch with Slimline cards.  I'll talk  more on those much later but they gave me alot of scraps to play with.  So if you know my routine I usually take all my scraps from the cards I make and make tags to stash into my tag box.  So here are the scrappy tags from all those Easter cards.


The first pic I used and old envelope punch and made a tiny envelope to put in the pocket and those tiny eggs are from a Tonic punch I got about 5 years ago.  In the bottom picture I used the same little eggs from the Tonic punch and those cute bunnies were from a super old Sizzix Steel rule yellow die.  I still have quite a few of the old school dies.  lol

Well these lovely's went into my tag box for future use.   Now on to the next project I missed lol.


HAPPY CARDING!!!!!!