TIPS AND TECHNIQUES

Wednesday, April 8, 2020

Little Art Journal

Earlier I posted an all die cut card with a little Art Journal for a little girls 8th birthday.  It reminded me that my own granddaughter has her journal from Rangers and has been working on pages.  I thought the little Art Journal would be perfect for some children who don't really want to get into the actual journaling part.  Since I'm not going to see my 2 grand-neices for Easter this year I decided to make each of them the little Art Journal.  I have tons, as I'm sure we all do, of scrap papers, embellies and little ink pads.  So I'm making them an Art box.

First up...the Art Journal.  No 2 journals turned out alike on the inside.  One had more card stock the other didn't.  But what did remain the same was the size.  The outside base started as a 8.75 x 8.75 heavy card stock scored at 4 and 4.75". 
I have no idea why I wrote on the white paper that the scores should be 4 & 5.25 because that would not make the front and back even so ignore that.  lol  The mats for front and back are cut at 3.75 x 8.5 and the spine layer is 5/8th x 8.5.

Now for the inside pages.  I made all pages 7.5 x 8.  I also had 2 separate sections.  So for example the first one might have had 4 different pieces of 65# card stock and maybe 5 printer pages and the next set might have had 5 different cardstock sheets and 7 printer sheets.  Each stack is folded to measure 3.74 x 8.  Then on the spine of the bases I attached 2 rows of elastic cording by just winding it around the spine and tying at top.  I then slipped the page inserts through the cording inside the base.

As you can see some of the pages are printed card stock others are solid colors or white.  I added some pockets to some of the pages and slipped in some blank ATC's and Tags for the girls to get artistic with.  Now each page can be removed for them to create their art work and when complete they can just slip it right back in between the elastic. The printer paper sheets can be used for plain doodling. I included in the box a bag of paper scraps for decorating and another bag filled with die cuts and punch pieces.
I included some samples for them too.  I made them 1 tag(on left) and 1 ATC (in middle) per book and a small piece showing how to make backgrounds using little ink pads.(top piece)  I included instruction on the back.  I added a pretty art paper clip to each book along with supplies for them to try their own.(on right)


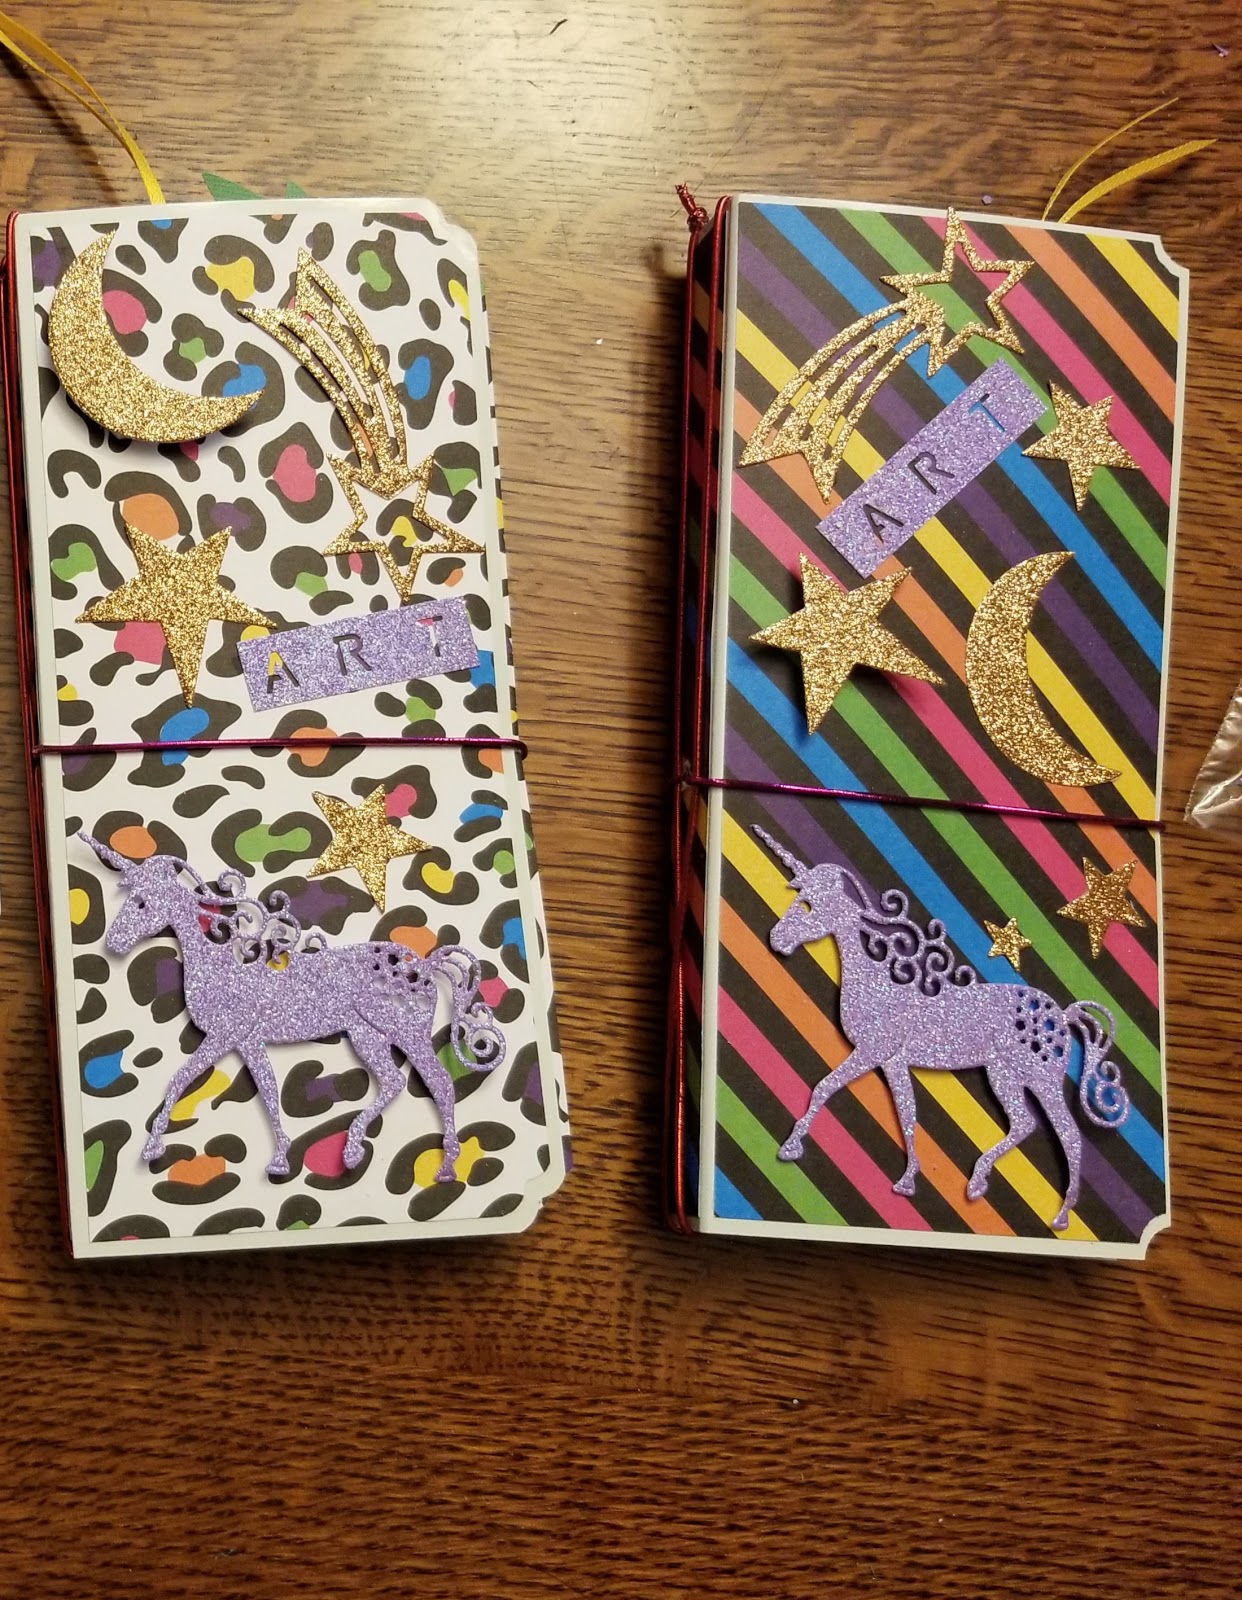
I also decorated the outside of each journal too.


Filled the box with previously loved stamps and inks and alot of other goodies.  Thought I was going to make a dent in my supplies but noooo...............lol!
almost filled

filled
I know this is filled with alot of pictures but I was so excited to put this together for them.  Their mom will be picking this up on Friday.  Both girls love to craft so they will have a blast with this and I got to widdle out some of my less used stash.  That means I can buy some new stuff right?  LOL

Til next time.......................................
HAPPY CARDING!

3 comments:

  1. Oh how fun! You're certainly going to bring a smile to her face with that great assortment of delightful items!

    ReplyDelete
  2. Oh Yes, new stuff! You have our permission, LOL! What a great box of treasures for the happy little crafters! I love the albums - they remind me of my teenage years when everything was Lisa Frank! Man, I'm old ..... great job, Sus!

    ReplyDelete
  3. What fun will be had when they get their crafty hands on these, Susan!! How awesome!!

    ReplyDelete